How to Use TaskFord to Turn Project Scope into a Complete Plan
Learn how to plan a project in TaskFord, from defining scope and organizing tasks to building a clear timeline your team can execute.
Starting a new project can feel overwhelming – especially when you only have a brief idea or a list of requirements.
This guide will walk you through how to build a complete project plan in TaskFord, step by step. You’ll learn how to go from a simple idea or request to a clear plan with tasks, timeline, and ownership.
You don’t need to get everything perfect from the start. Follow these steps, and your project will quickly take shape.
Use this workflow when you want to:
- Start a new project from scratch
- Turn a brief into actionable tasks
- Align your team before execution
- Build a realistic timeline
Phase 1: Set Up Your Project Architecture (The Hierarchy)
The Goal: Before adding tasks, set up a clear structure for your project. Think of it like creating “sections” first, so your work doesn’t turn into one long, confusing list.
In TaskFord, you organize work from the big picture down to the smallest action using this hierarchy:
| Project Level | In TaskFord |
|---|---|
| Workspace | Create a Workspace where your team and all projects are managed. |
| Portfolio (optional) | Create a Portfolio to track progress across multiple related projects in one place. |
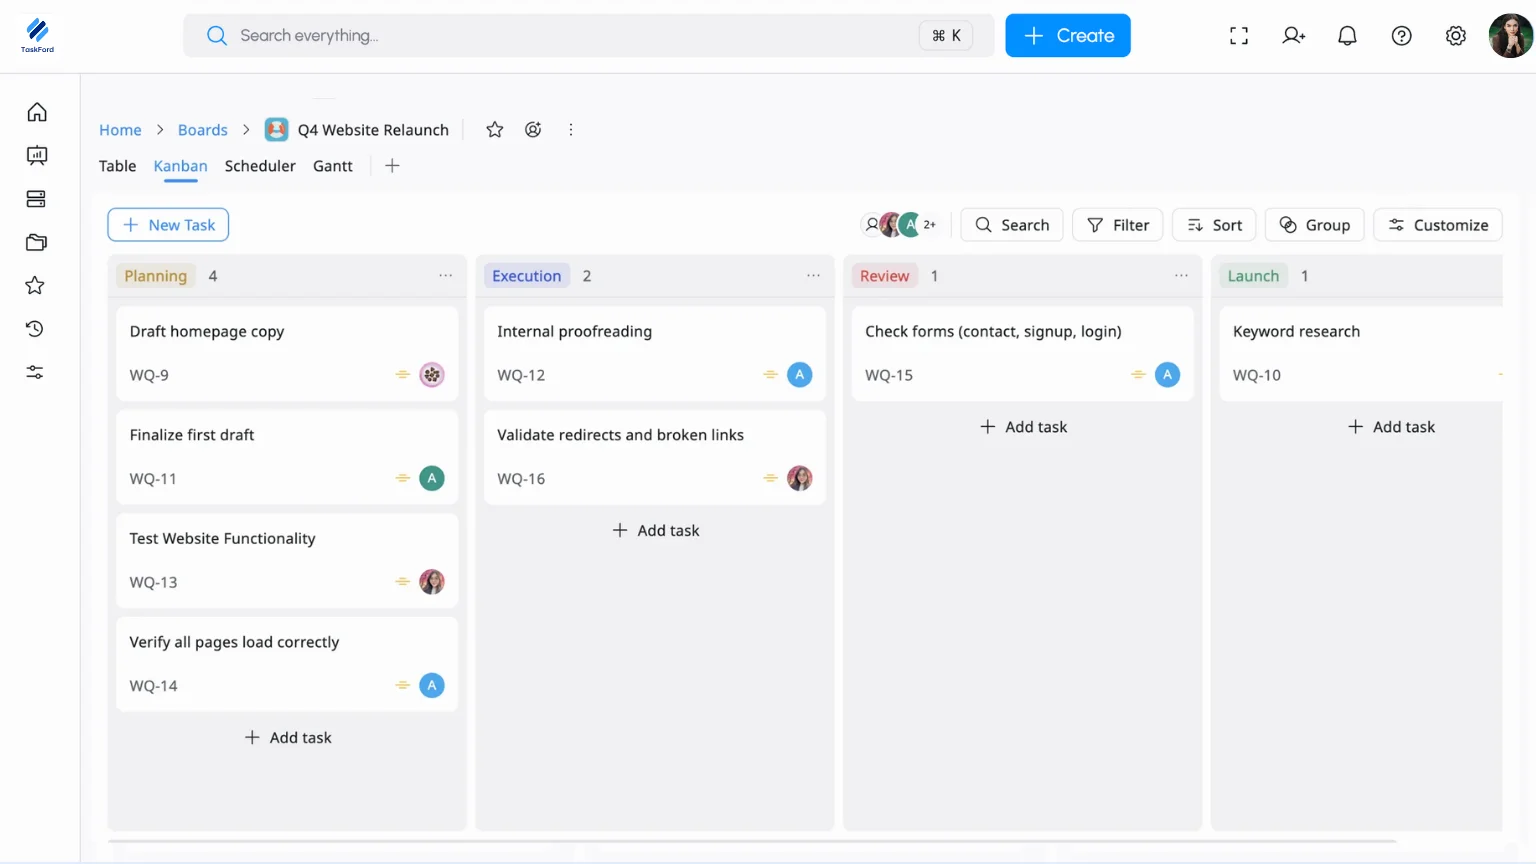
| Project | Create a Board (e.g., Q4 Website Relaunch). Start with Table or Kanban view, you can switch to Gantt later. |
| Phases | Create Phases to represent the main stages of your project (e.g., PLANNING, EXECUTION, REVIEW and LAUNCH). |
| Deliverables | Add Tasks to represent key outcomes (e.g., Draft Homepage Copy). |
| Action Steps | Add Subtasks to break tasks into smaller steps (e.g., Keyword research, Internal proofreading). |
Phase 2: Define “The Rules” with Custom Fields
The Goal: Set up simple rules to keep your project consistent and easy to manage. While TaskFord provides standard fields like Priority, Custom Fields allow you to add the specific labels your team needs to stay on track.
1. Use the Built-in Priority
TaskFord already includes a Priority field by default. You can find this on every task card. Simply click the Priority icon on a task and select HIGHEST, HIGH, MEDIUM, or LOW.
2. Add Your Custom Fields
For everything else that TaskFord doesn’t track automatically, you’ll create a Custom Field.
What are Custom Fields? Custom Fields are extra labels you can add to tasks to store important information and keep your project organized.
Based on your project settings, here are the two we recommend setting up now:
| Field | Description |
|---|---|
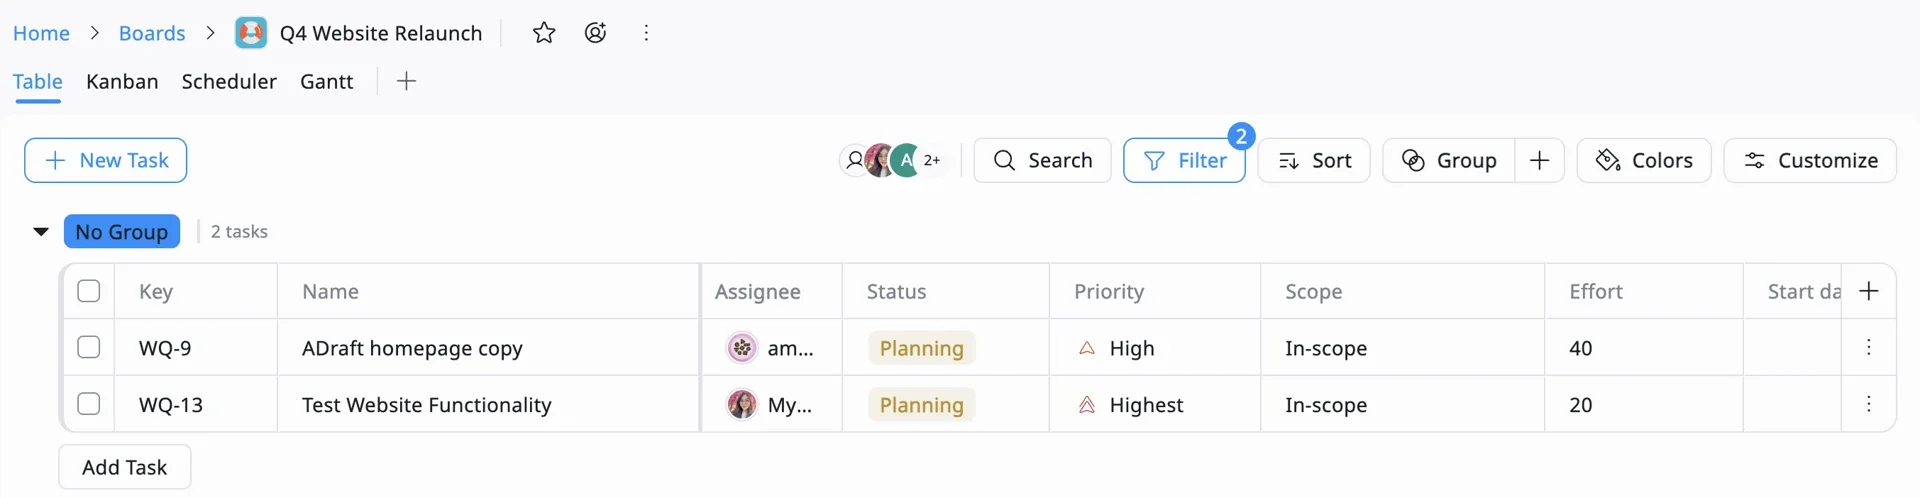
| Scope (Text Field) | Identify whether a task is In-Scope (part of the original plan) or Out-of-Scope (a new request). |
| Effort (Number Field) | Enter the estimated hours or days. This is the secret to a realistic plan, it prevents you from accidentally assigning 60 hours of work to one person in a 40-hour week. |
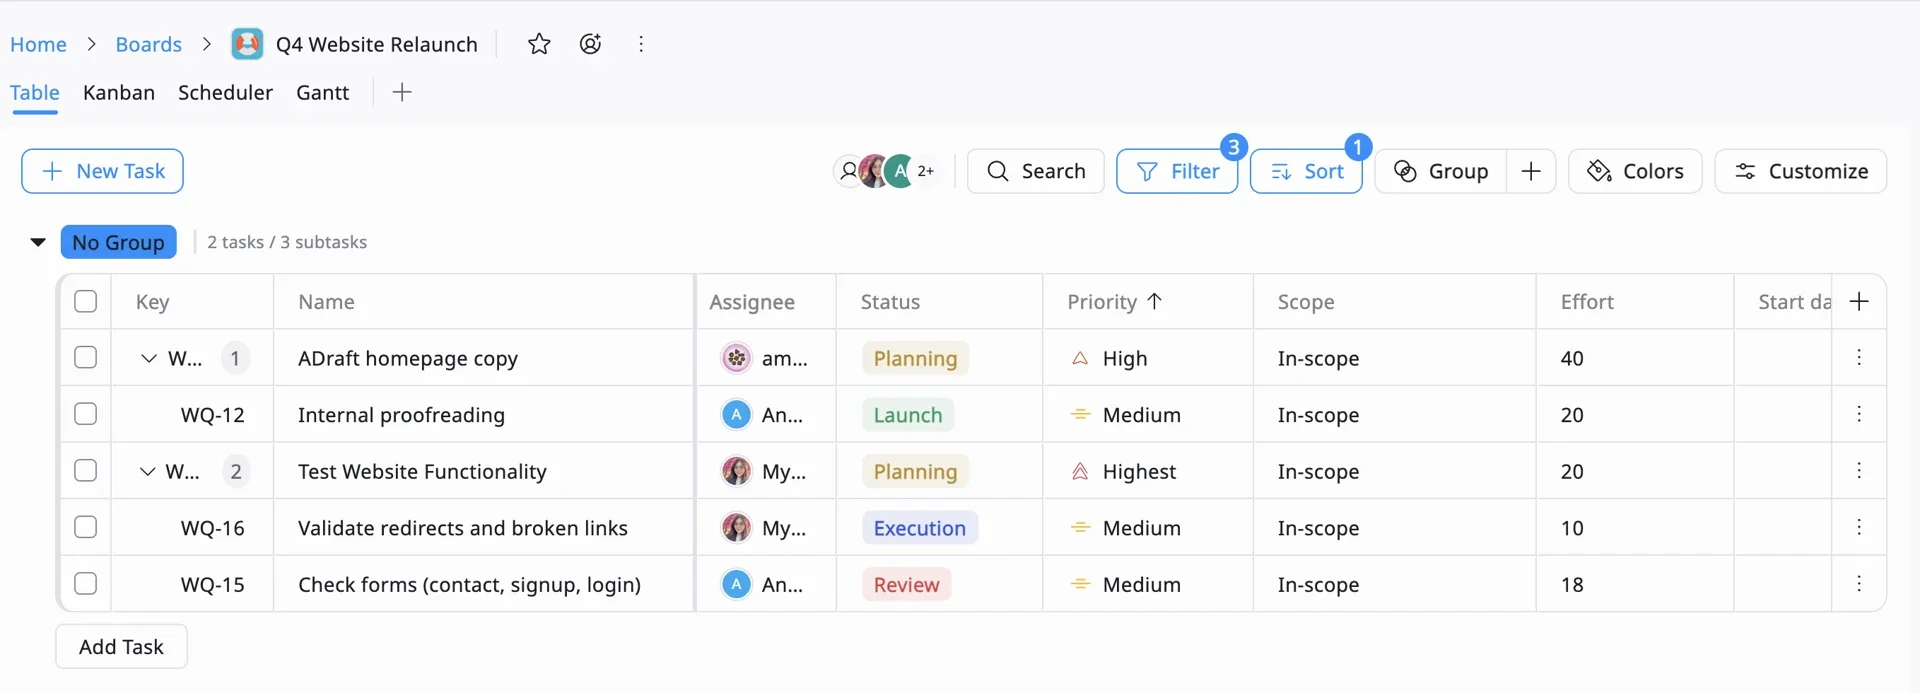
💡 Tip: Once you’ve added these fields, try clicking the “Filter” or “Sort” button at the top of your board. You can instantly hide everything except “High Priority” tasks to see where your focus needs to be right now!
Phase 3: Break Down the Work
The Goal: Now that your structure (Phase 1) and rules (Phase 2) are set, it’s time to add the work. The secret to a successful plan is breaking big, scary goals into small, manageable pieces.
1. Create Actionable Tasks
A Task is a single piece of work that one person can own.
- Be Specific: Instead of a vague task like “Marketing,” use “Write first draft of Launch Email.”
- The “Rule of 8”: If a task feels too big or will take more than 8 hours, it’s probably a Phase. Break it down into smaller tasks so your team feels a sense of progress every day.
2. Use Subtasks as your “Checklist”
Sometimes a task has a few small steps but only one owner. Use Subtasks to make sure nothing is forgotten. Example:
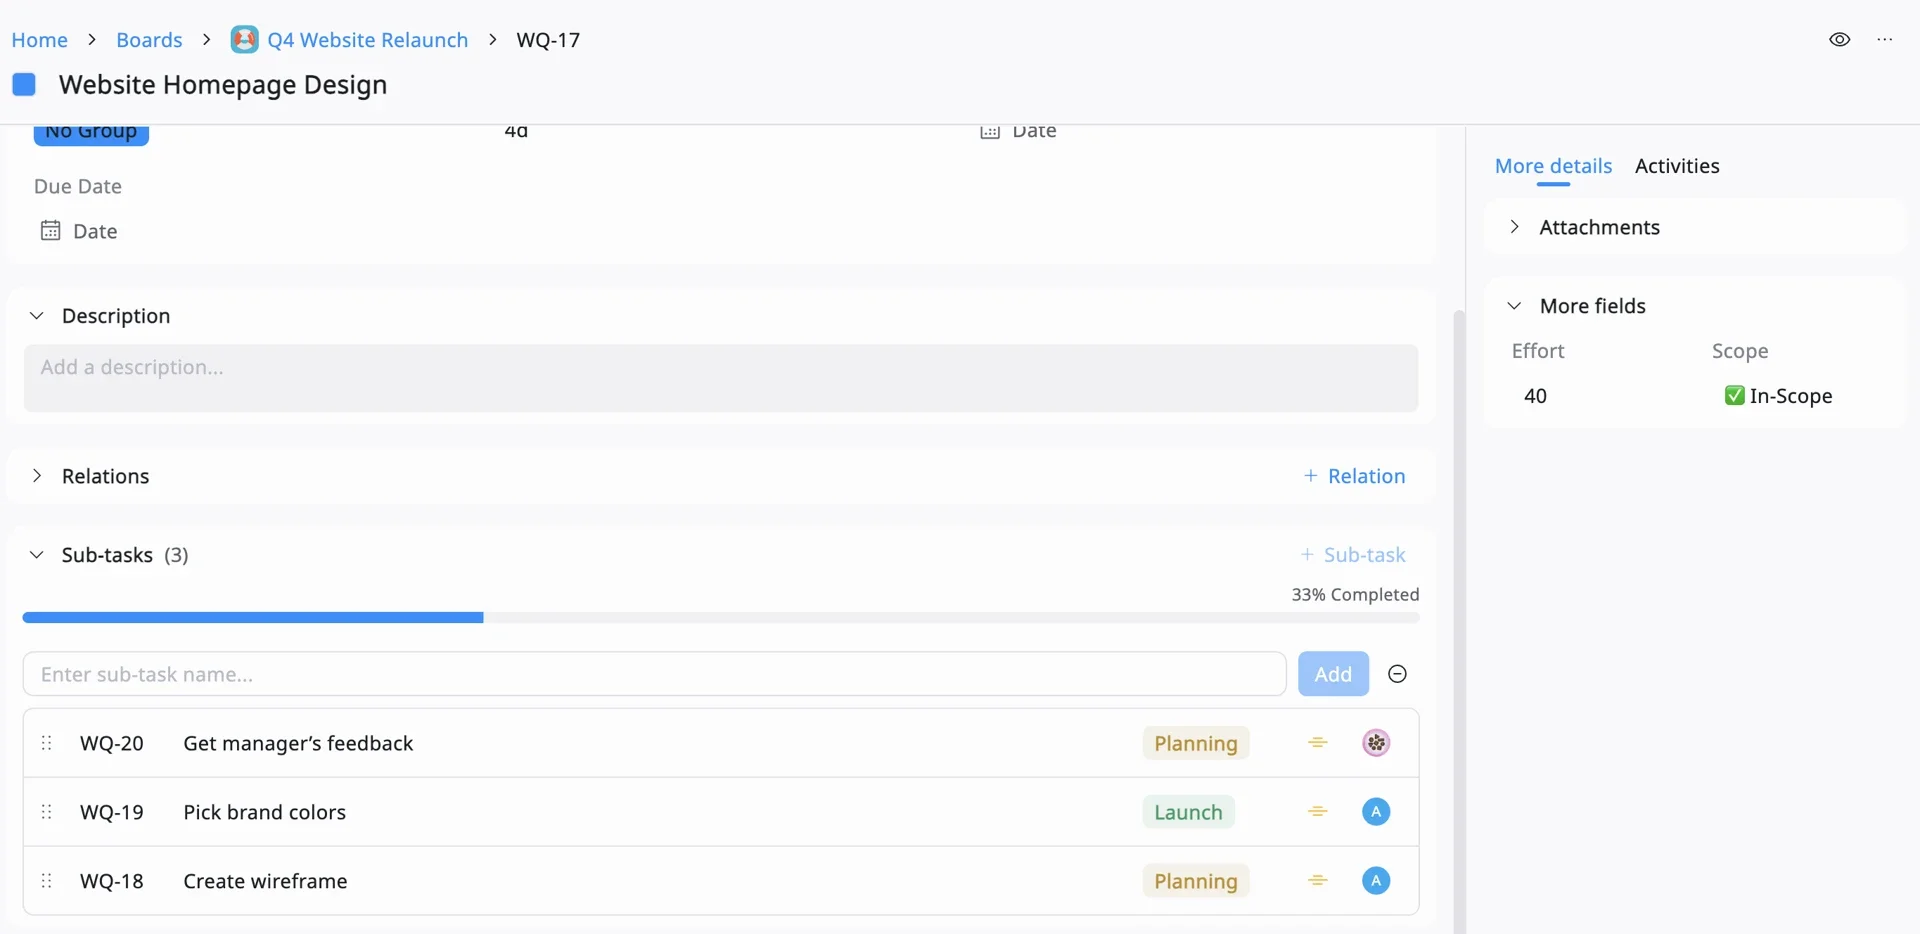
- Task: Website Homepage Design
- Subtasks:
- Create wireframe
- Pick brand colors
- Get manager’s feedback
3. Assign Ownership & Dates
A plan only moves forward when people know they are responsible for it.
- Assign One Owner: Every task should have one person’s face on it. If two people “own” a task, often no one feels truly responsible.
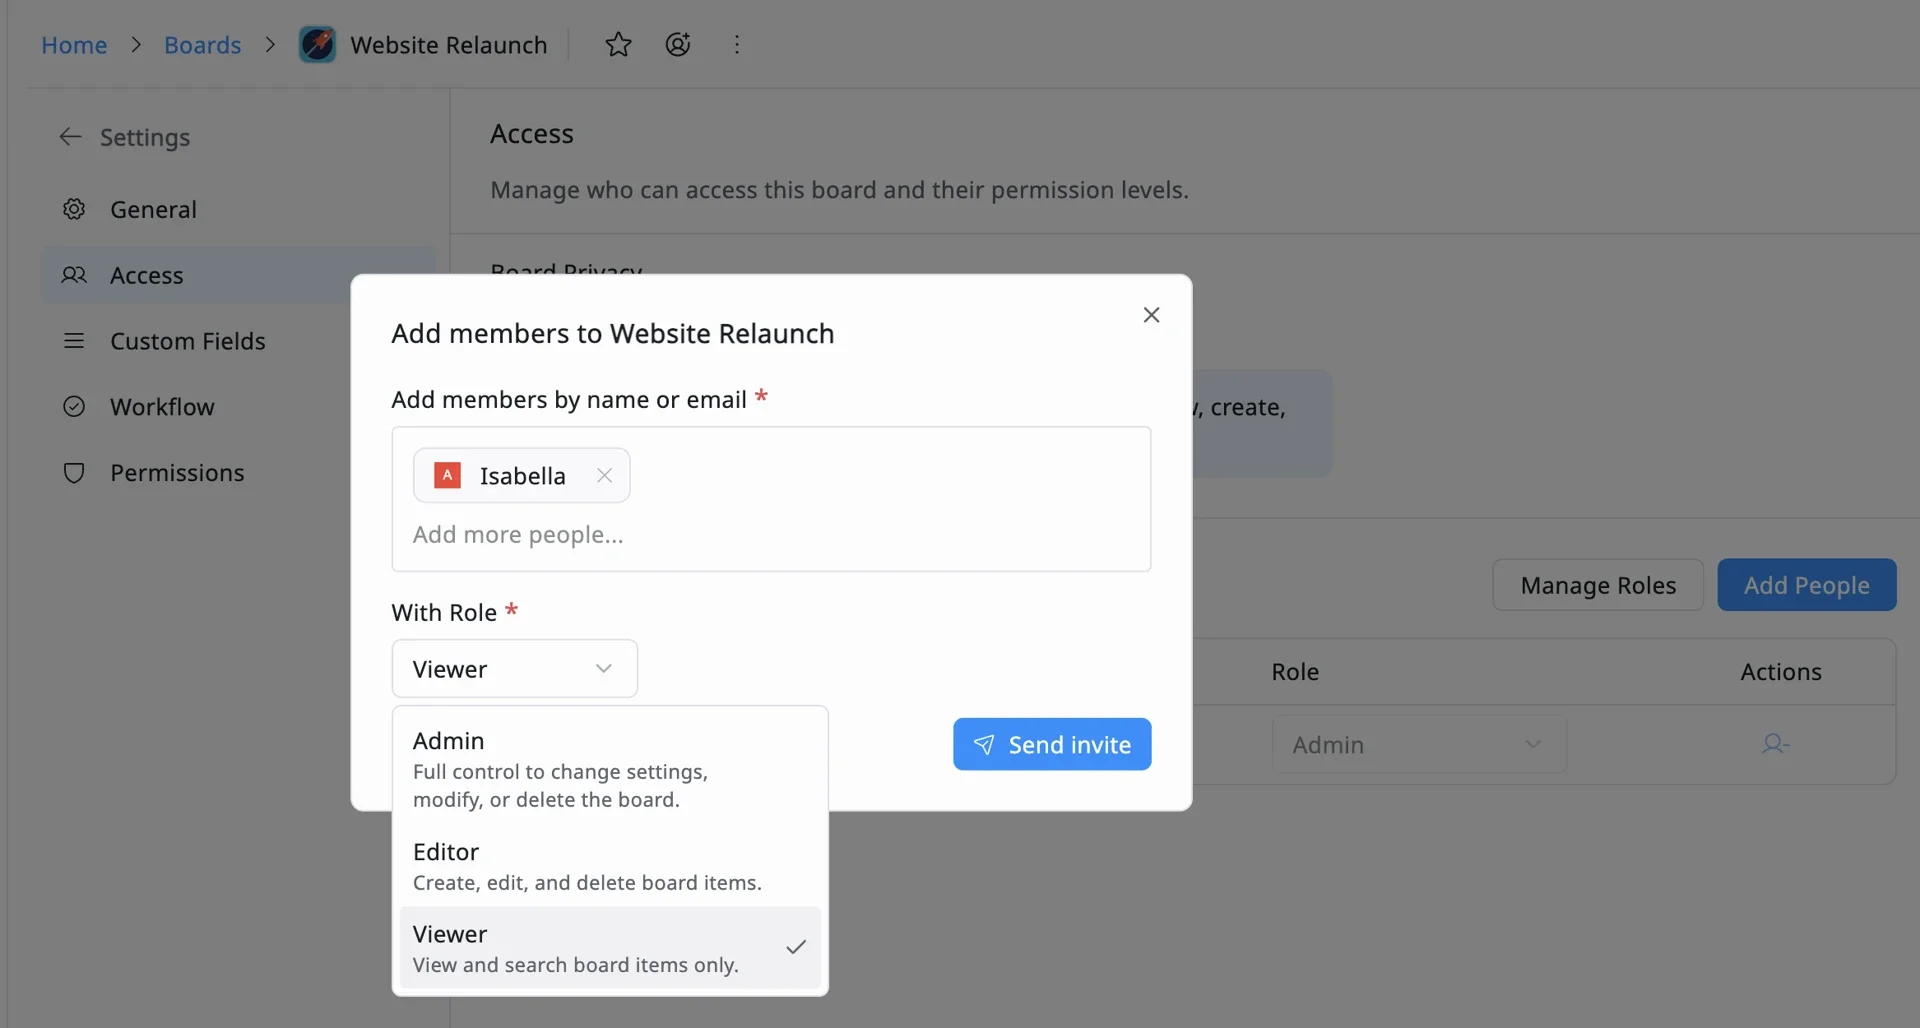
- Set Board Permissions: Use TaskFord’s roles to define how the team interacts with the plan:
- Admins: Project leads who manage the structure and settings.
- Editors: Team members who update their tasks and check off subtasks.
- Viewers: Stakeholders who need to stay informed without making changes.
- Set Start & Due Dates: Even if it’s just an estimate, adding dates is essential. This allows TaskFord to plot your work on the Schedule Board and build your visual timeline.
Phase 4: Seeing how it all fits together on a Timeline (Gantt View)
The Goal: Now that your tasks and owners are set, use the Gantt View to see how they fit together. This turns your list into a visual timeline to help spot overlaps and set realistic deadlines.
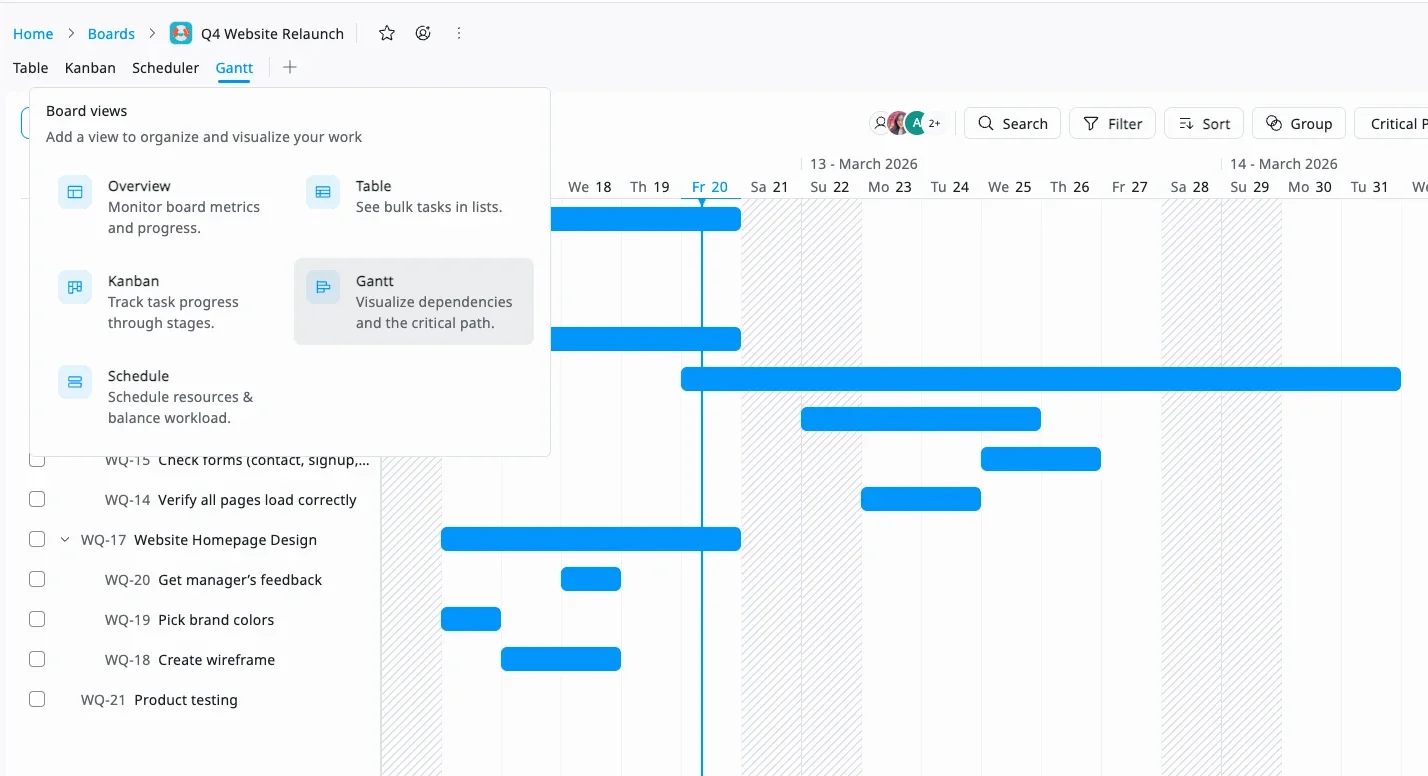
1. Switch to Gantt View
Click the plus (+) icon at the top of your TaskFord board and select Gantt. This transforms your list into horizontal bars across a calendar.
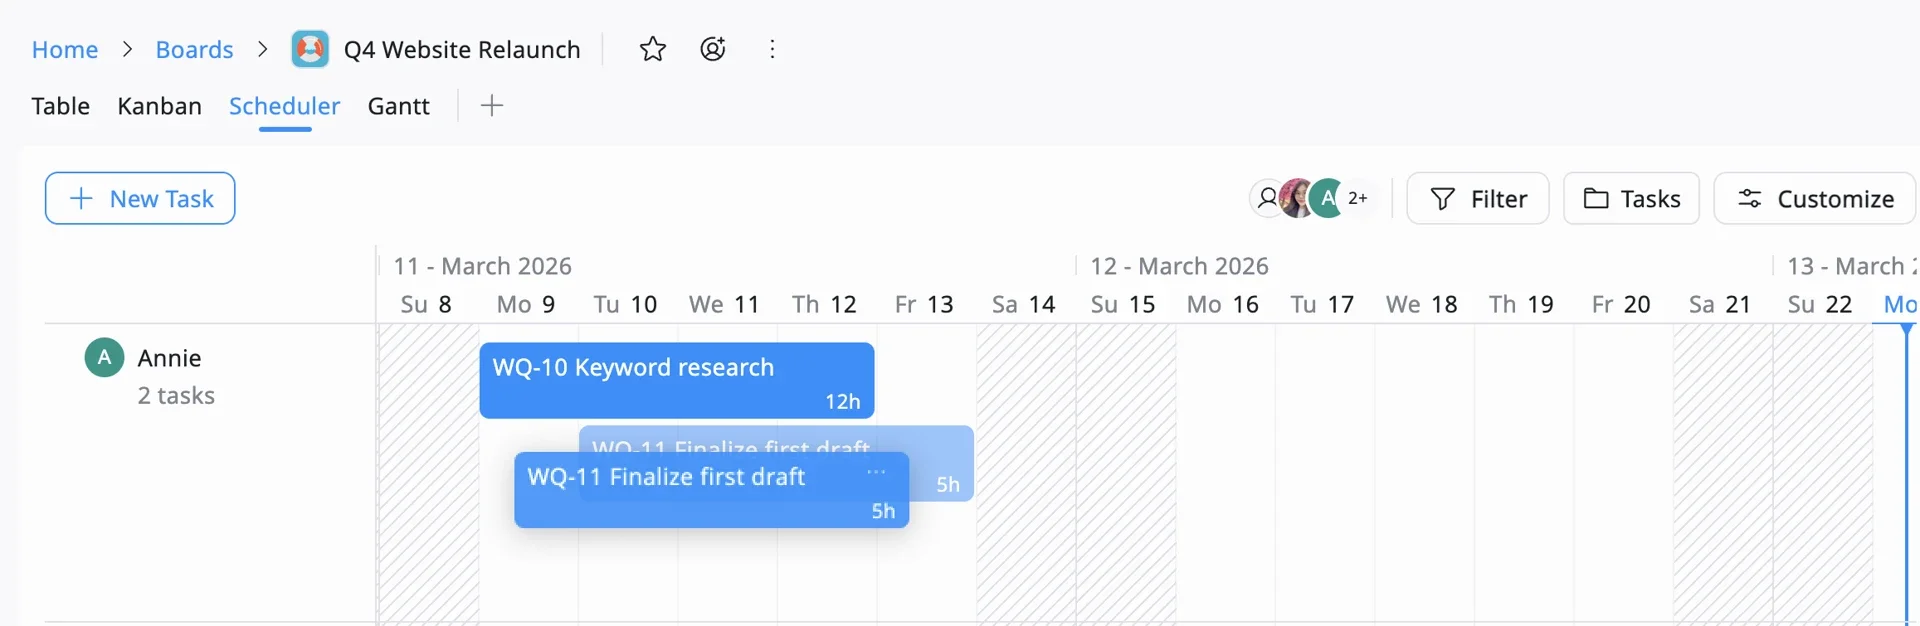
2. Schedule Your Tasks
If you didn’t add dates in Phase 3, you can do it visually here, In TaskFord, the Schedule Board is your command center for timing:
- Click and Drag: Simply click on a task bar and stretch it across the days it will take to complete.
- Adjust on the Fly: If a task is taking longer than expected, drag the end of the bar to extend it.
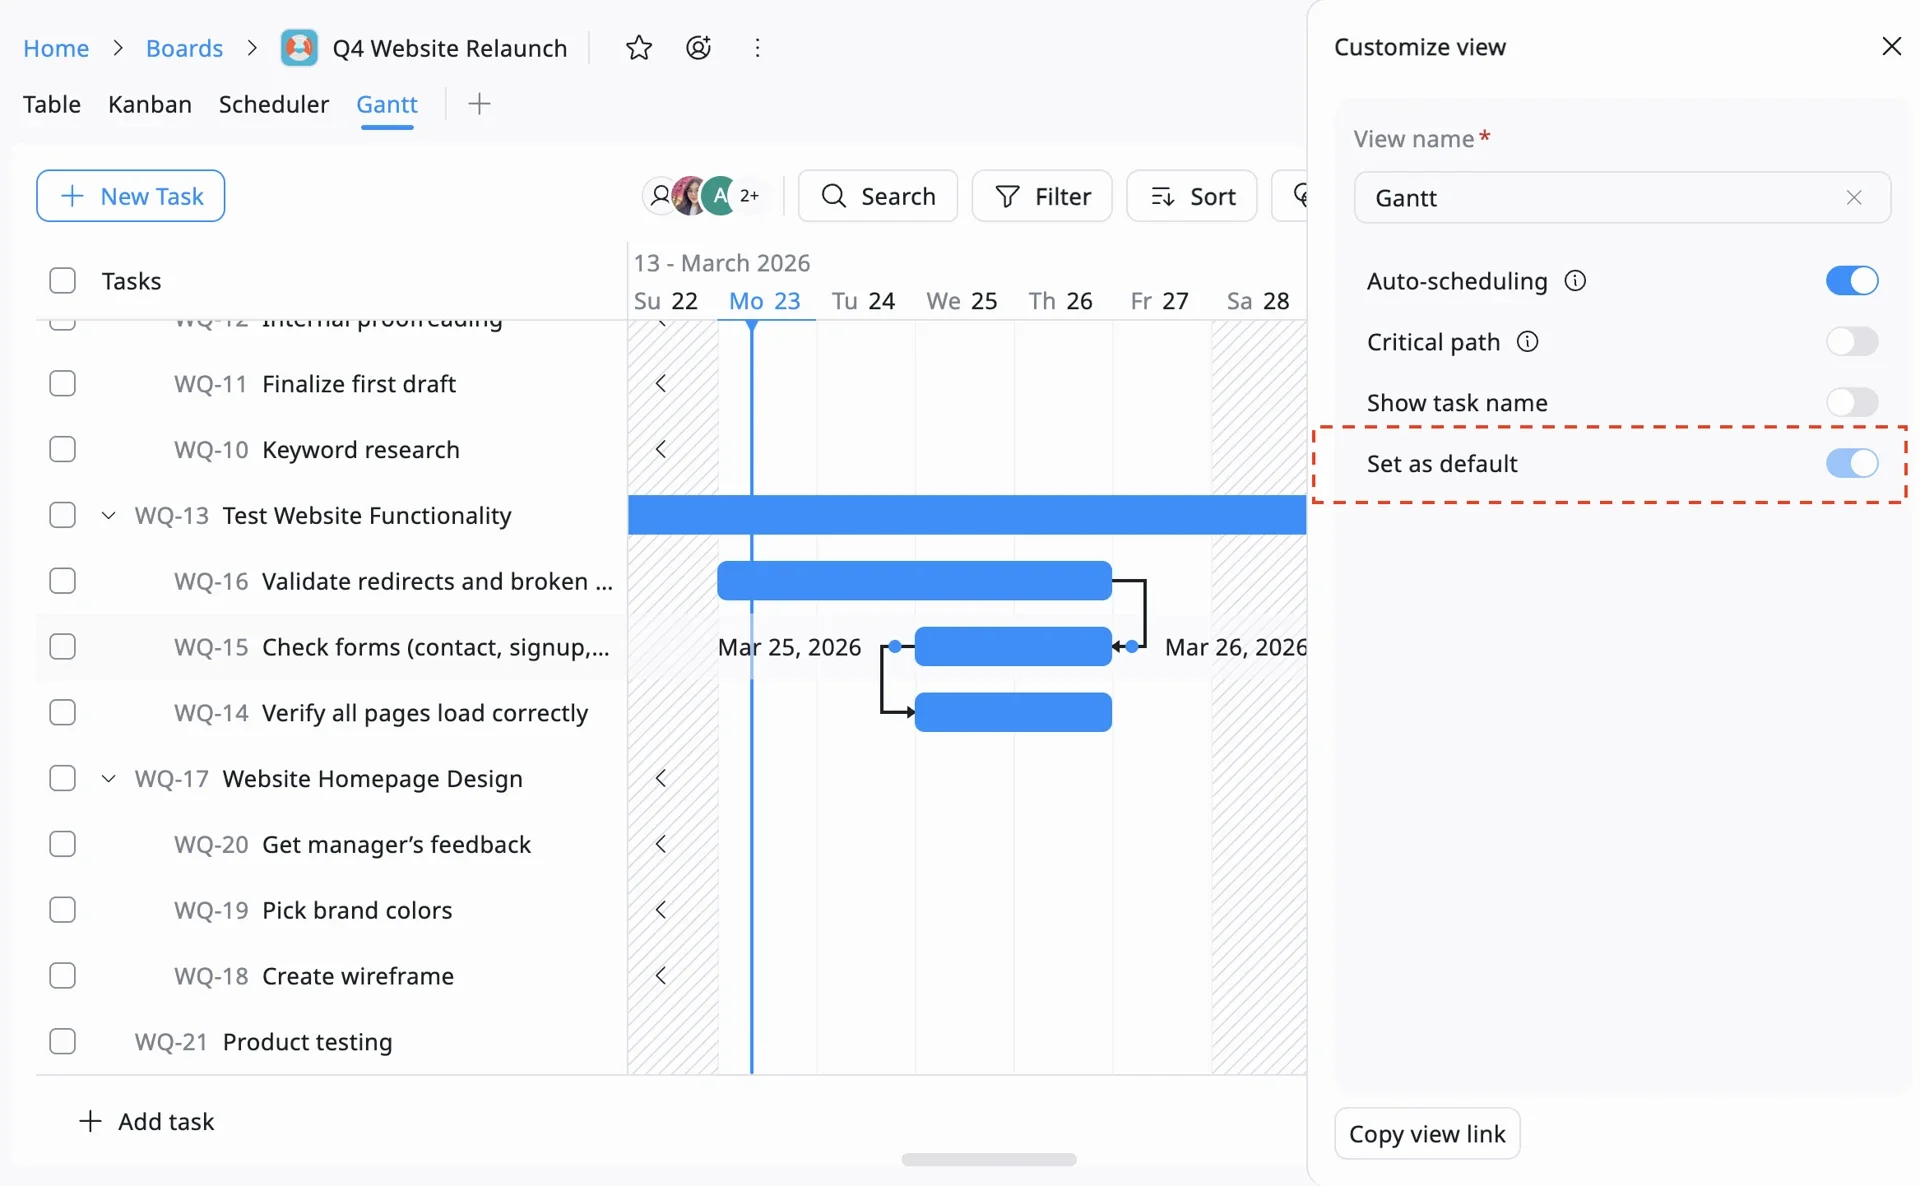
3. Create Dependencies
In many projects, Task B cannot start until Task A is finished (e.g., you can’t Launch a Website until the Copy is written). These are called Dependencies.
- How to set them: Hover over a task bar in the Gantt view. Look for the small “connector” dots at the ends of the bar. Click and drag a line from the end of one task to the start of the next.
- The Magic of Auto-Scheduling: In TaskFord, if the first task is delayed, the connected tasks will automatically shift forward. You won’t have to manually update every single date in the project!

4. Set the Default View for the Team
Once your timeline looks perfect and the dependencies are connected, make sure your team sees it this way.
- Save the View: Go to your view settings and select “Set as Default View for Everyone.”
The Outcome: Your Project is Ready! ✅
Congratulations! You have successfully moved from a brief idea to a structured, professional project plan. Your team now has:
- A Clear Structure: Organized by Phases (Phase 1).
- Shared Rules: Using Priority and Custom Fields (Phase 2).
- Clear Ownership: Every task has an owner and a checklist (Phase 3).
- A Visual Timeline: A realistic schedule that updates automatically (Phase 4).
👉 Your team can now start executing with clarity and confidence
Subscribe for Expert Tips
Unlock expert insights and stay ahead with TaskFord. Sign up now to receive valuable tips, strategies, and updates directly in your inbox.