Apply conditional colors in Table view
Apply conditional color formatting in Table view to automatically highlight cells or rows based on task data, making key information stand out at a glance.
- Board Admins / Board Editors can apply conditional color formatting in the Table view.
- App Admins / App Editors can apply conditional color formatting in the Table view only on Open boards.
Conditional color formatting allows you to automatically highlight cells or rows in Table view based on rules you define. This makes it easy to spot high-priority items, overdue tasks, or other specific conditions at a glance, without manually scanning the board.
How to set up conditional colors
Open the color highlight panel
- Go to your board and switch to Table view.
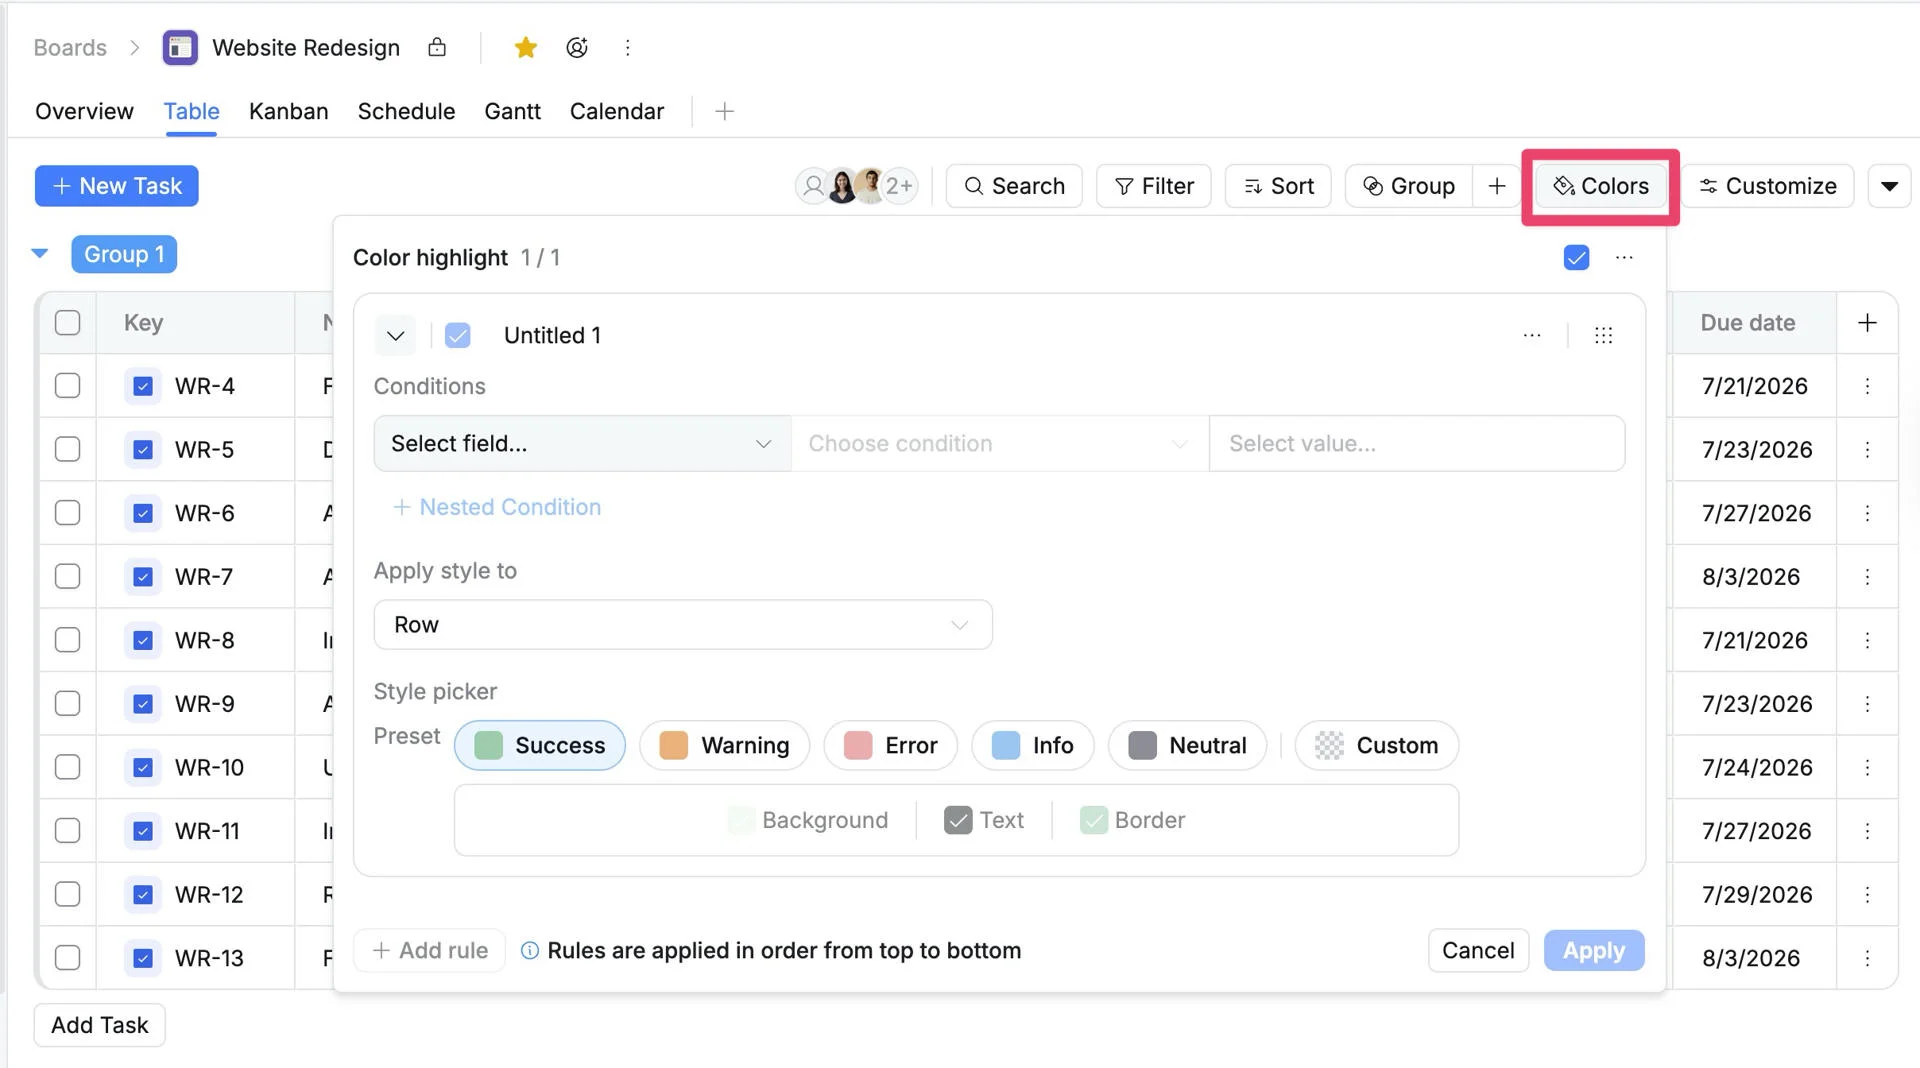
- In the toolbar, click Colors.
- The Color Highlight panel opens. From here you can create, edit, reorder, and delete color rules.
Set up a color rule
Step 1: Name your rule (optional)
Click the default rule name (e.g., “Untitled 1”) to rename it to something descriptive, such as “High Priority” or “Overdue Tasks.”
Step 2: Define the condition
Under Conditions, configure what the rule should look for:
- Select field: Choose the task field to evaluate (e.g.,
Priority,Status,Assignee). - Choose condition: Select the condition type (e.g., “
is”, “is not”, “contains”). - Select value: Enter or choose the value to match (e.g., “High”, “In Progress”).
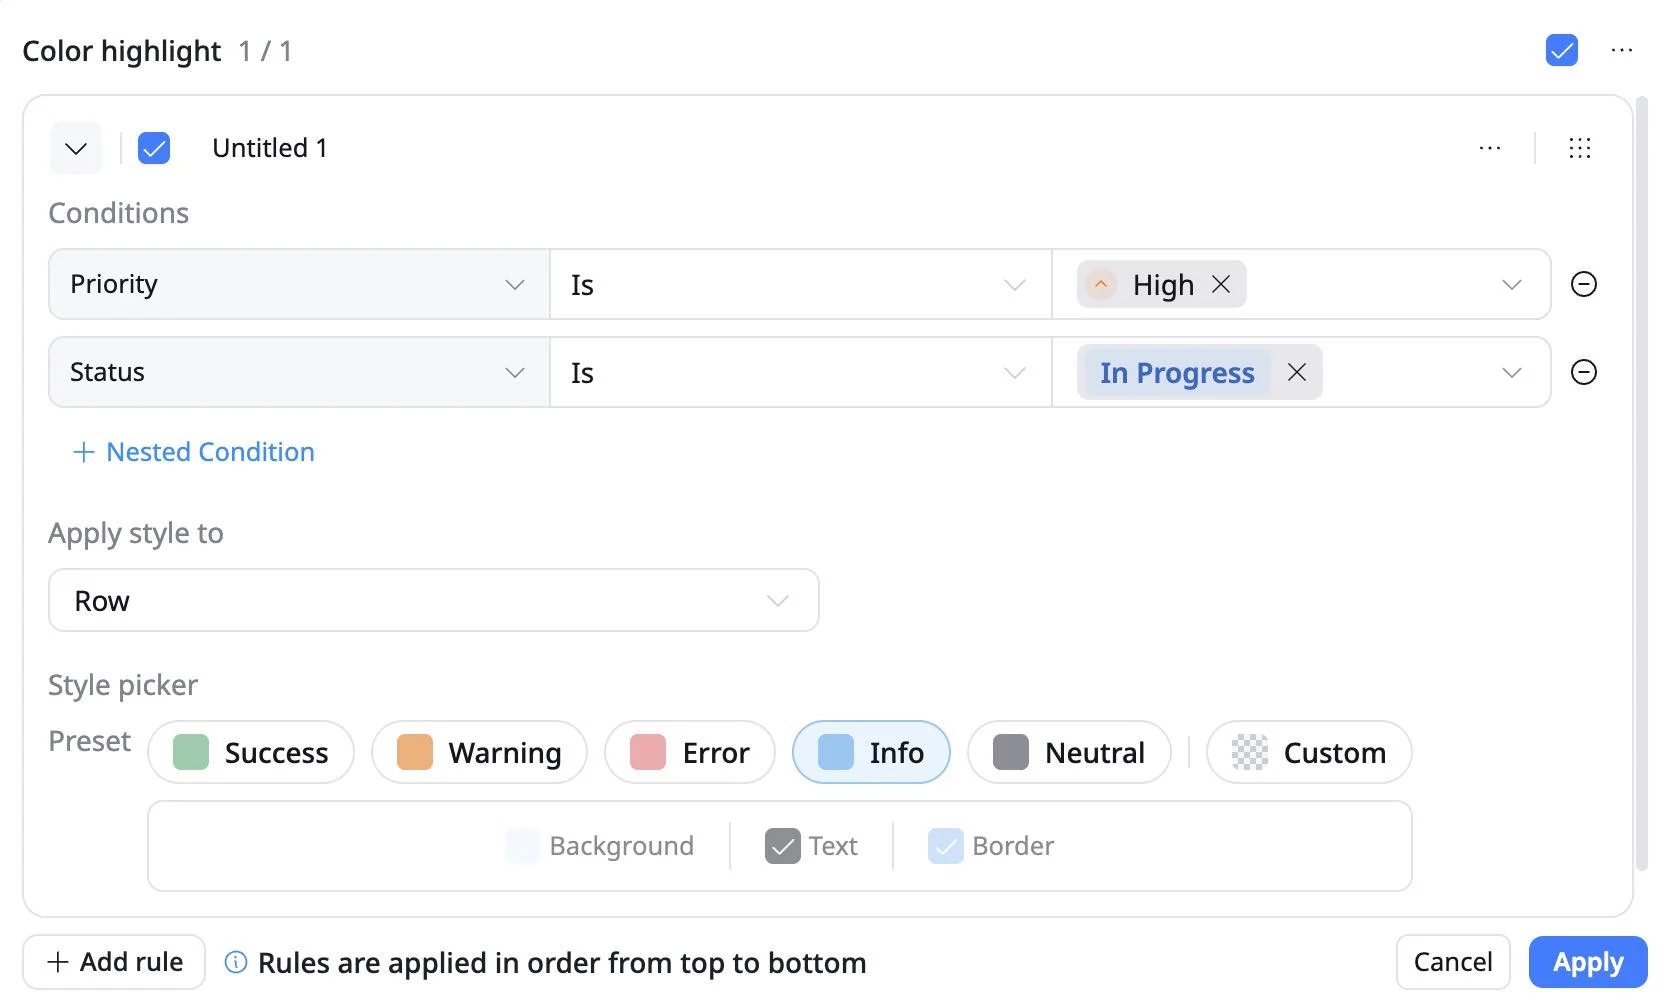
The + Nested Condition allows you to apply multiple criteria to a single color rule. Instead of highlighting tasks based on just one field, you can combine two or more conditions to make your formatting more specific
Step 3: Choose what to color
Under Apply style to, select what gets highlighted when the condition is met:
- Row: Colors the entire task row.
- Cell: Colors only specific cells. Choose the specific field you want the color to apply to from the dropdown menu.
Step 4: Choose a style
- Pick a preset color (Success, Warning, Error, Info, Neutral).
- Or choose a custom color by clicking Background, Text, or Border to apply color exactly where you want it.
Step 5: Apply the rule
Click Apply to save the rule and see it take effect on your view immediately.
Add multiple rules
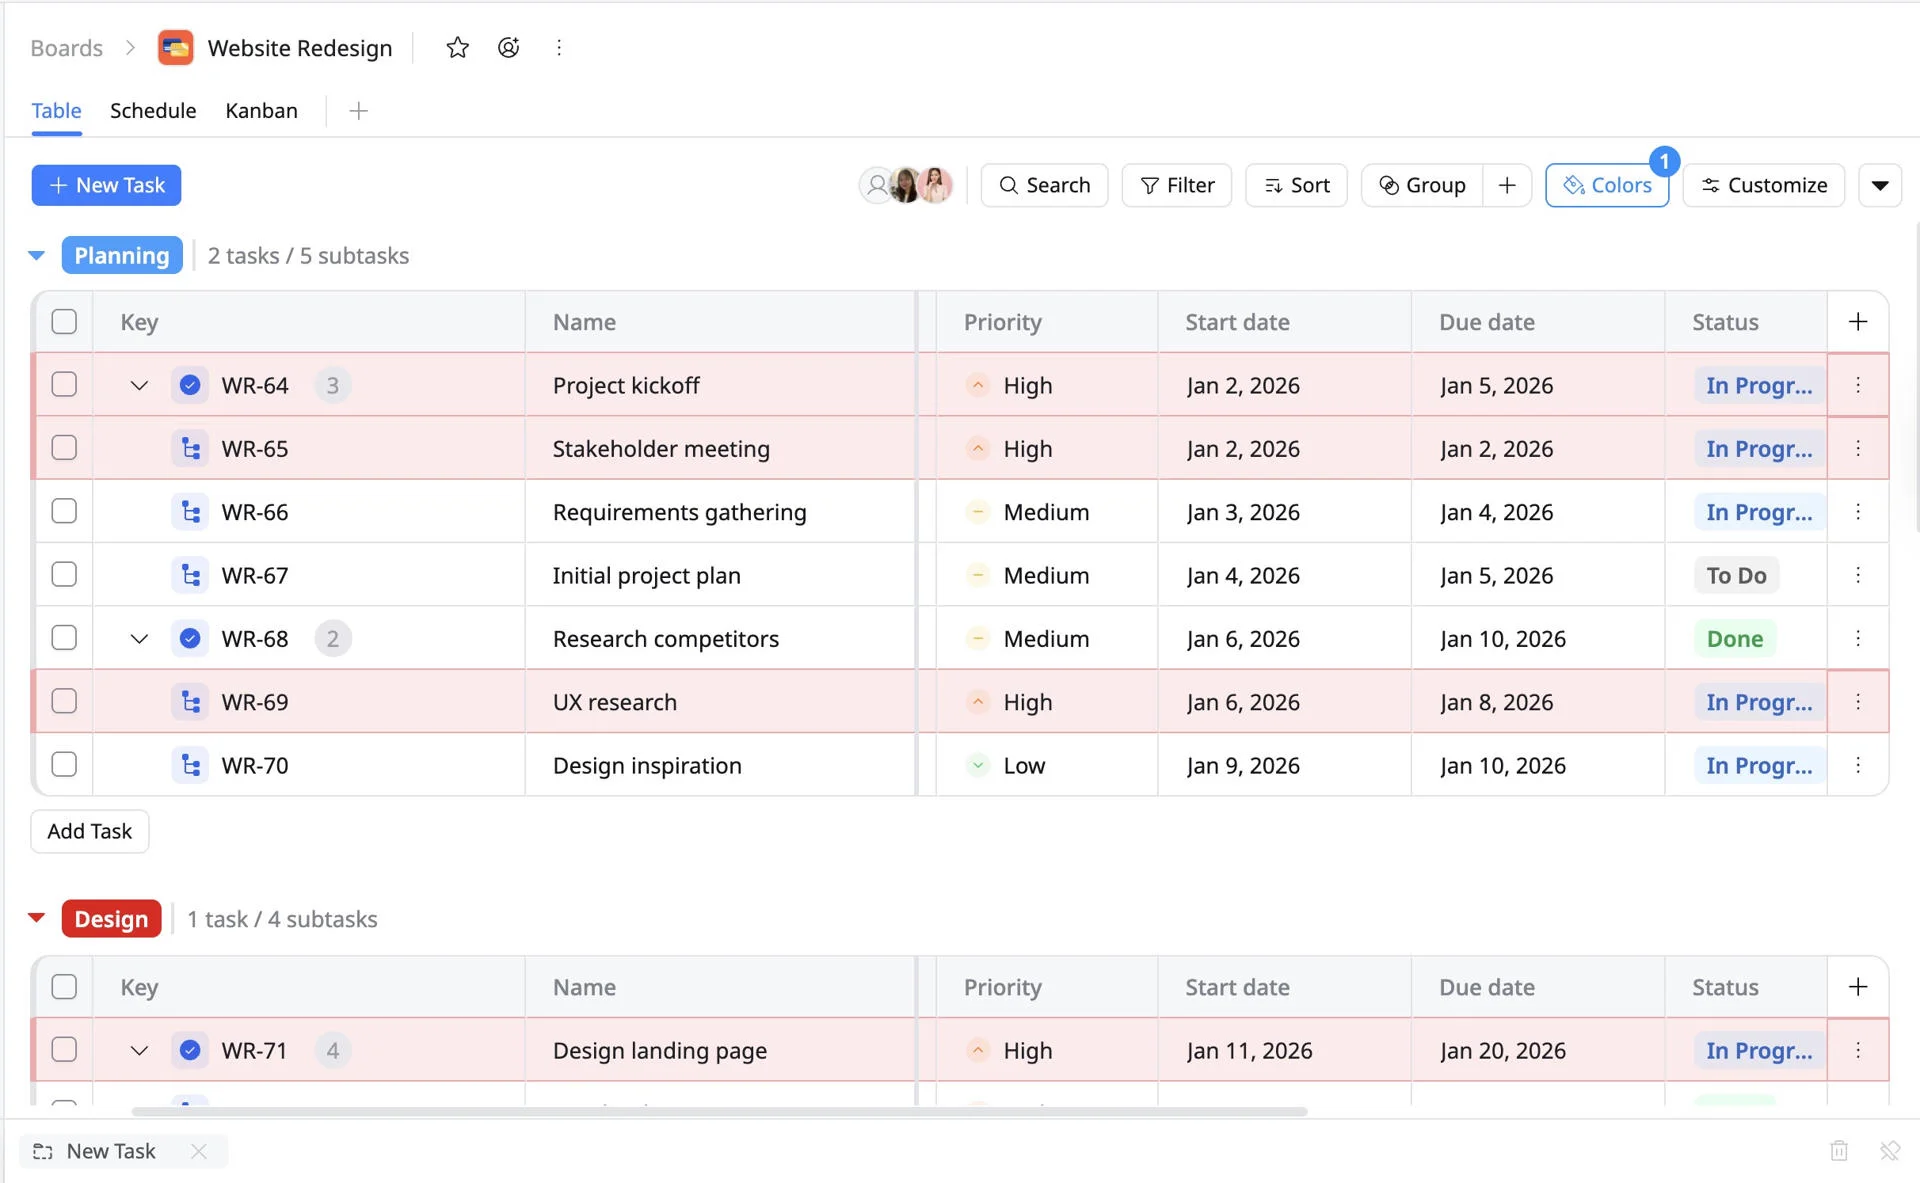
You can create multiple color rules at the same time, each targeting different conditions. This allows you to highlight tasks based on priority, assignee, status, or any combination of criteria.
Steps to add a new rule:
- After creating your first rule, click + Add rule at the bottom of the Color Highlight panel.
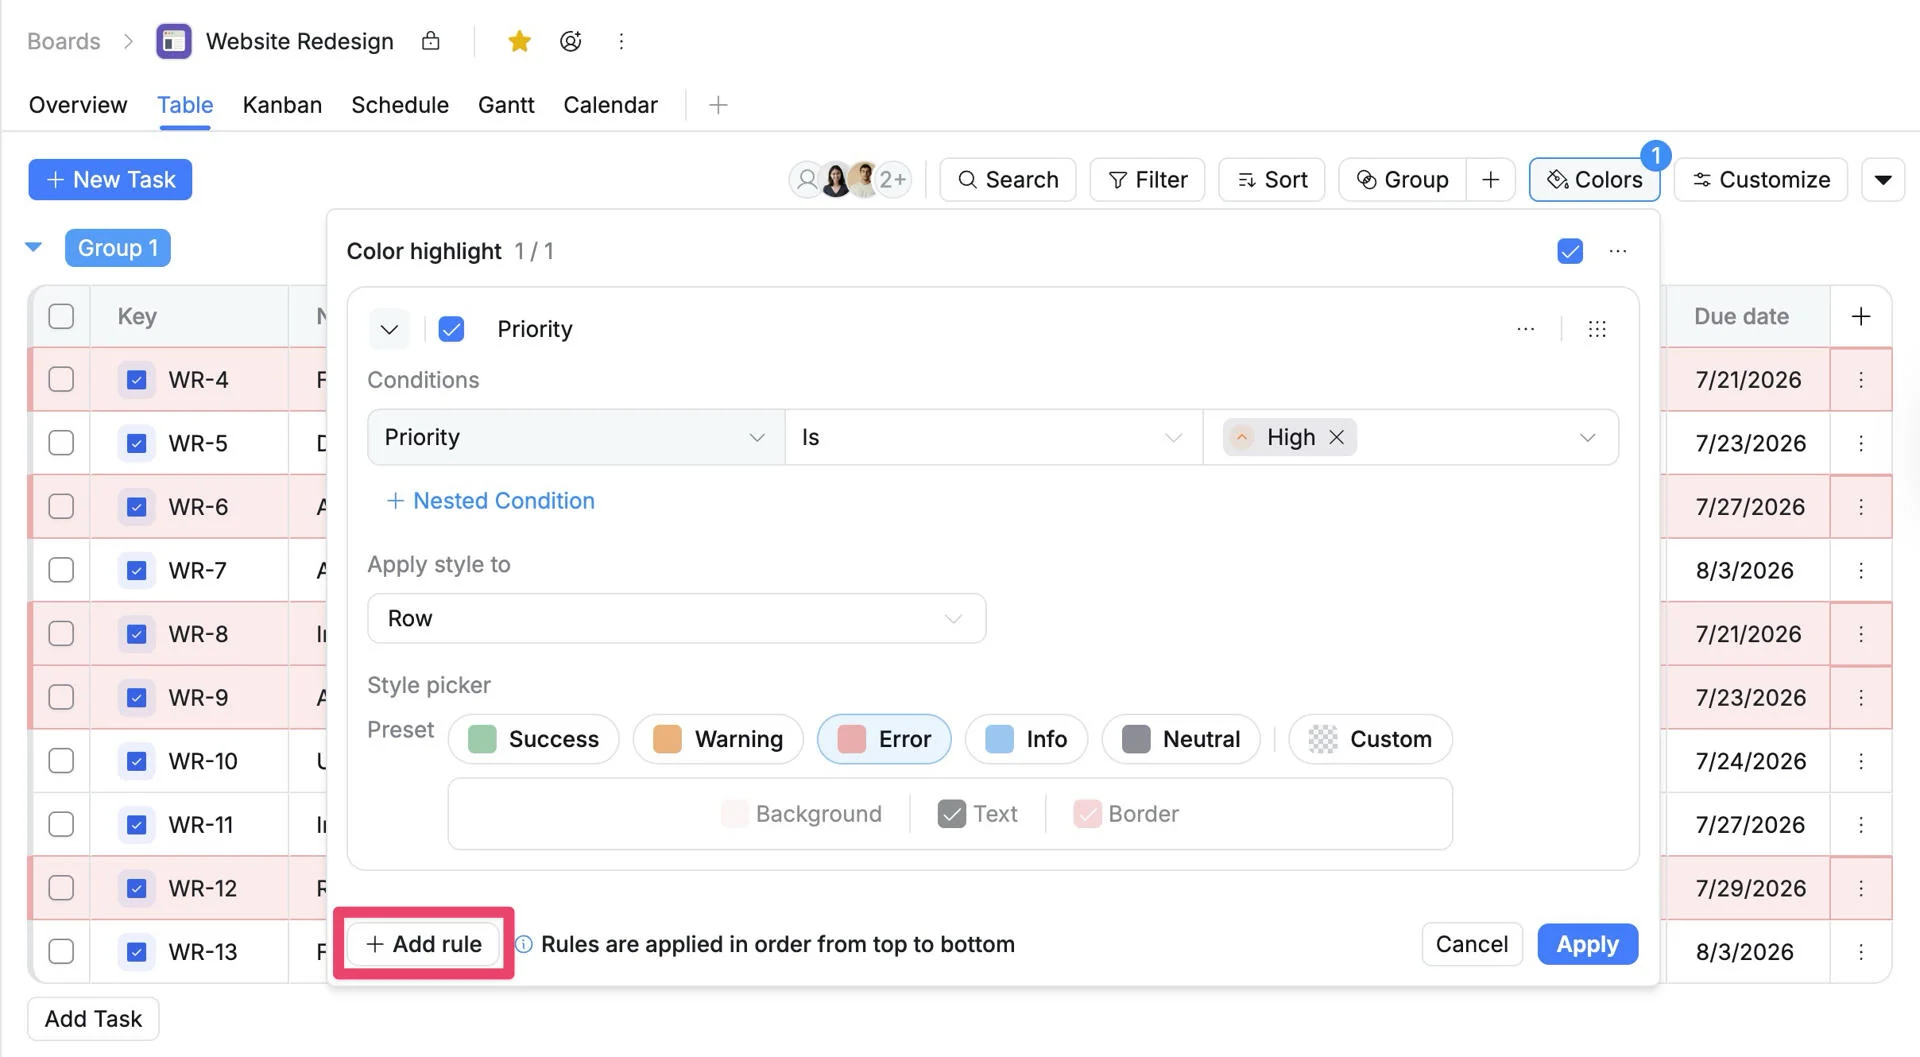
- A new blank rule will appear.
- Set up the rule just like the first one:
- Name the rule (optional for clarity, e.g., “High Priority” or “Joey’s Tasks”).
- Define the condition(s) the rule should match.
- Choose whether to color the Row or Cell.
- Select a style using preset colors or custom colors for Background, Text, and Border.
- Repeat these steps for as many rules as you need.
- Click Apply to save all rules at once.
When multiple rules are applied, they are evaluated in order from top to bottom. If two rules overlap for the same task, the color from the first matching rule will take precedence.
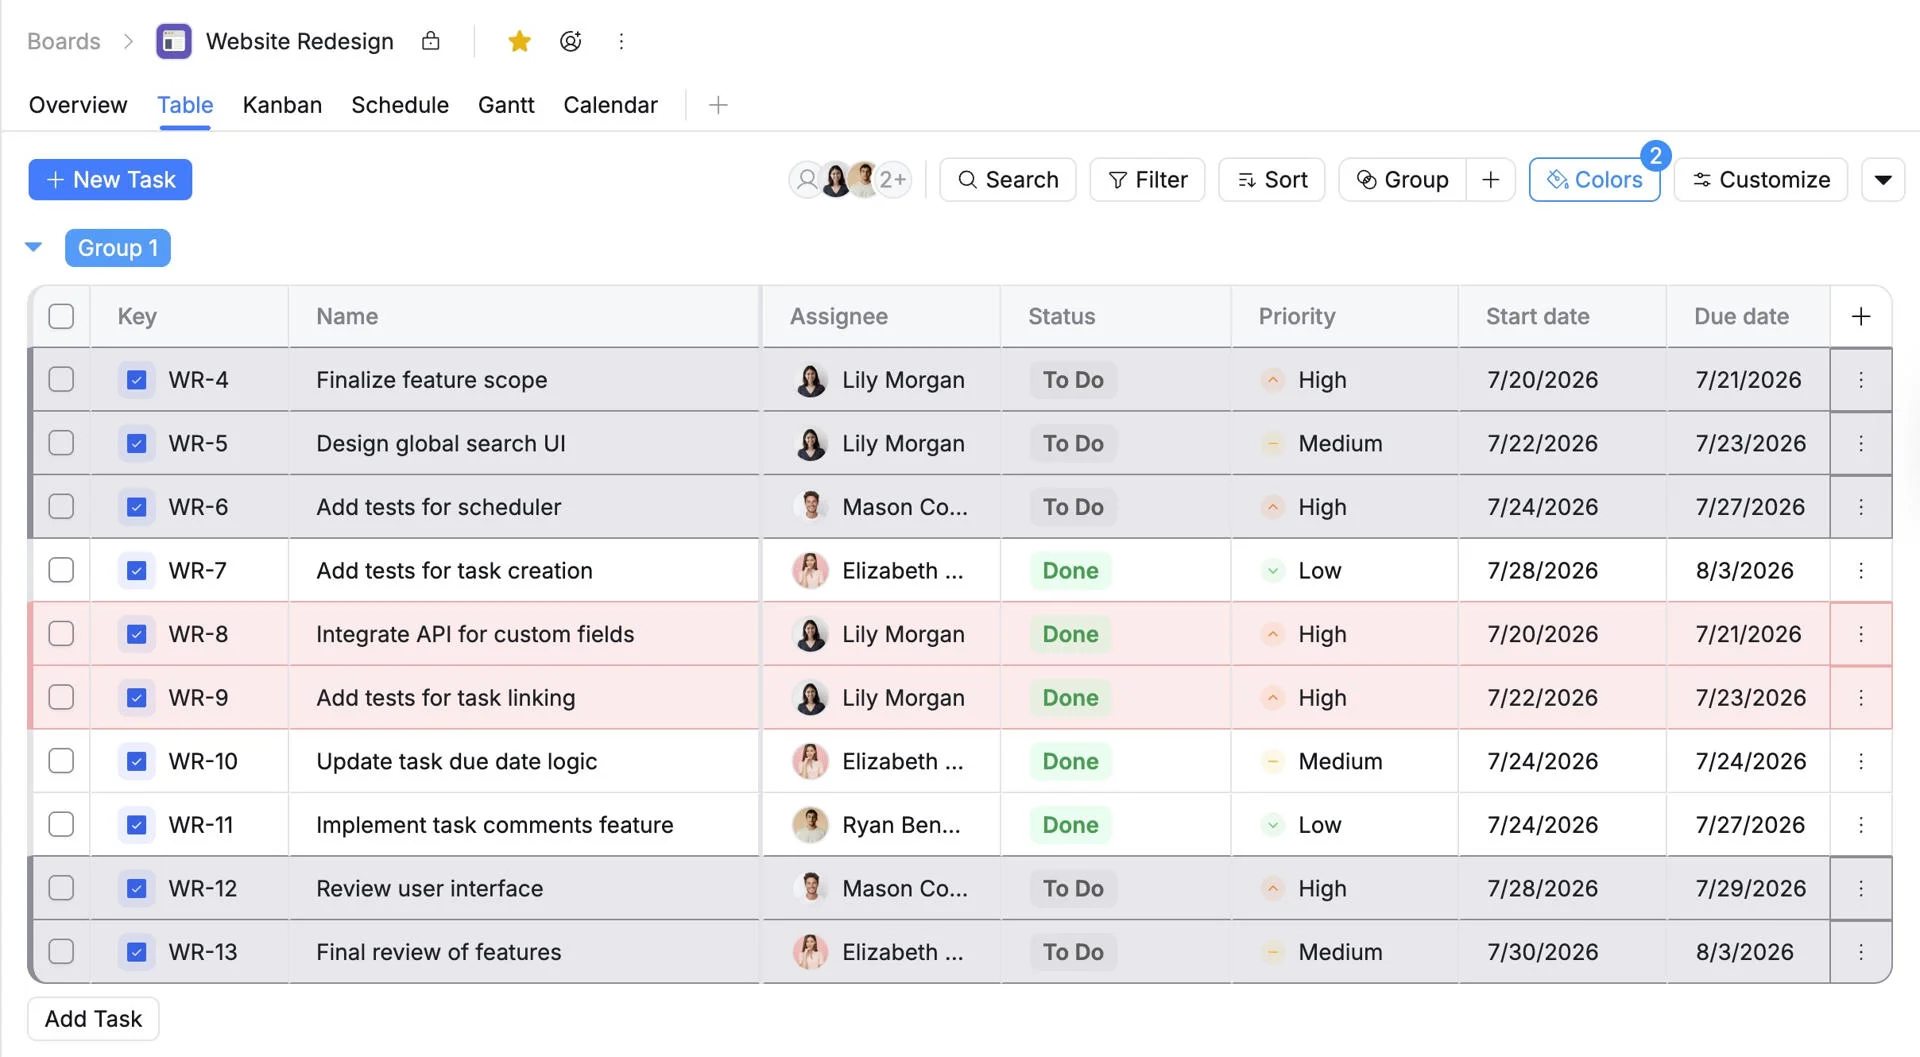
Reorder a color rule
To change the order:
- In the Color Highlight panel, hover over the rule you want to move.
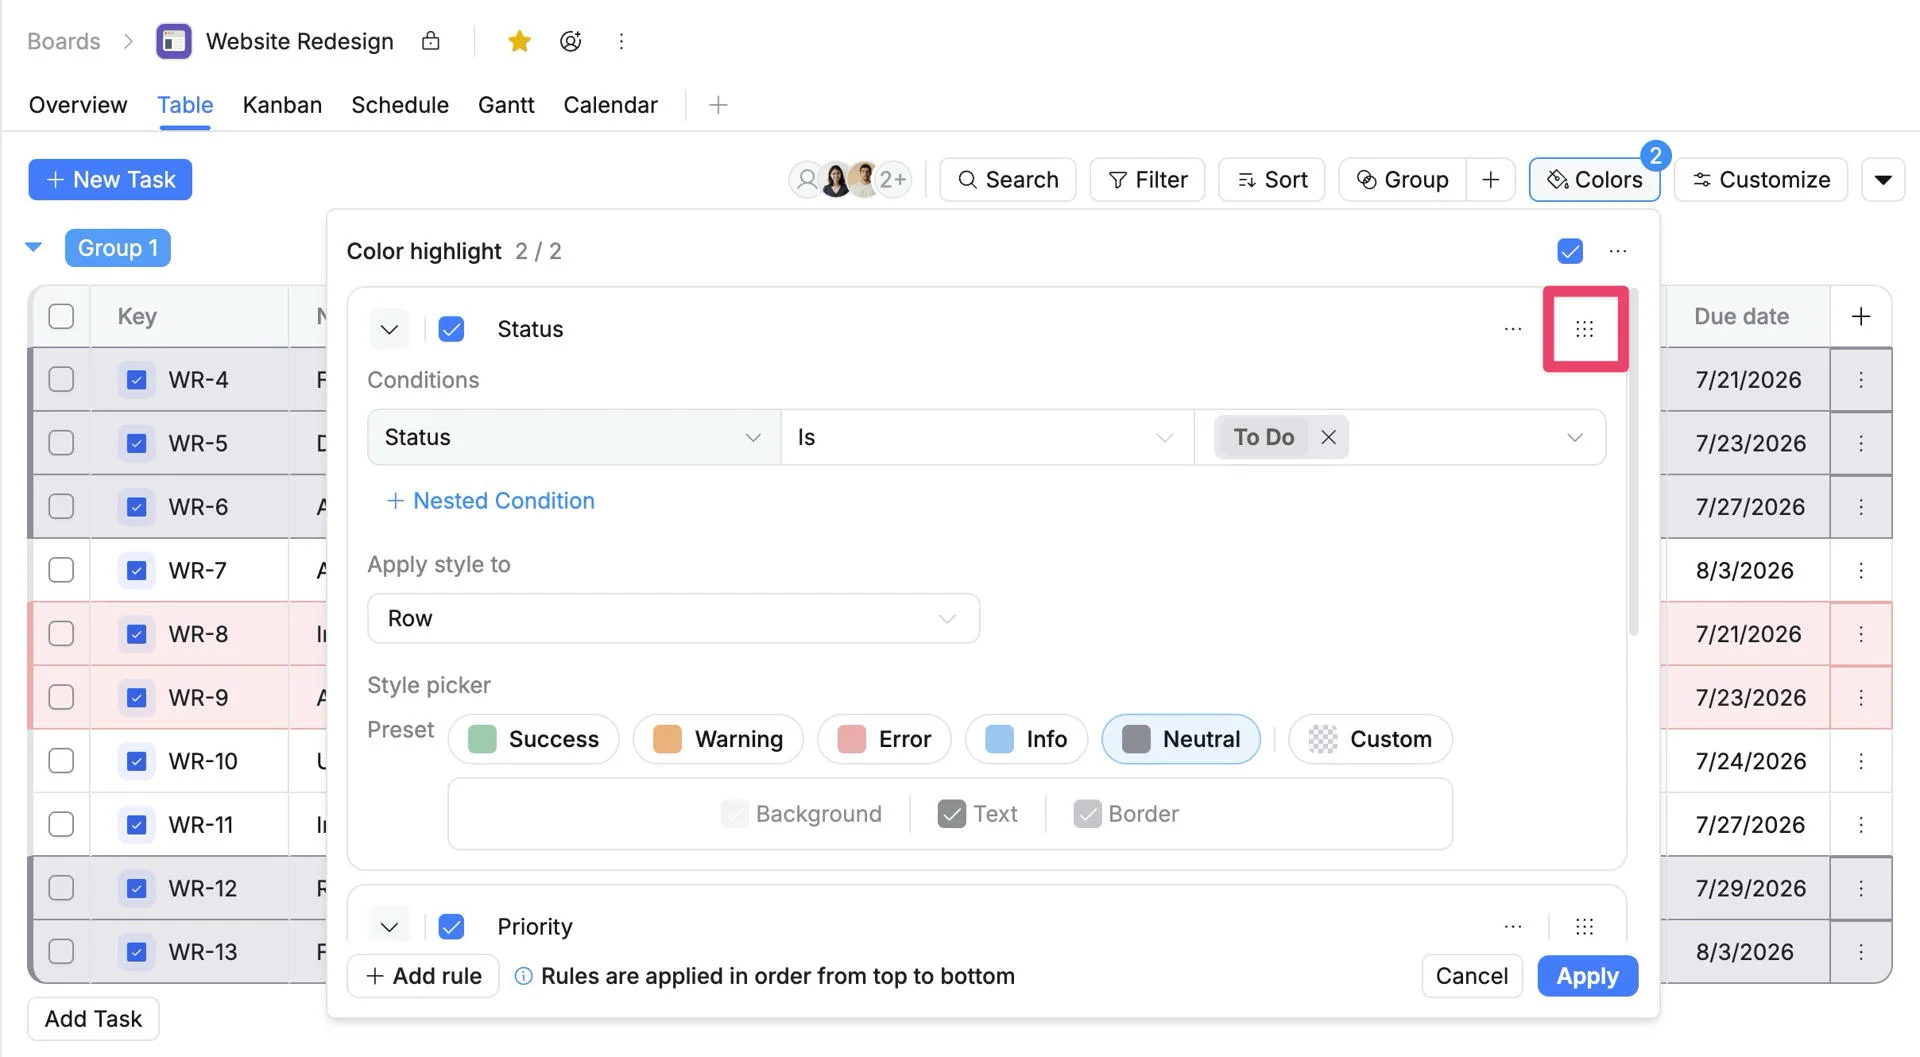
- Click and hold the drag handle (the grid icon ⠿ on the right side of the rule).
- Drag the rule up or down to its new position.
Quickly reorder a color rule
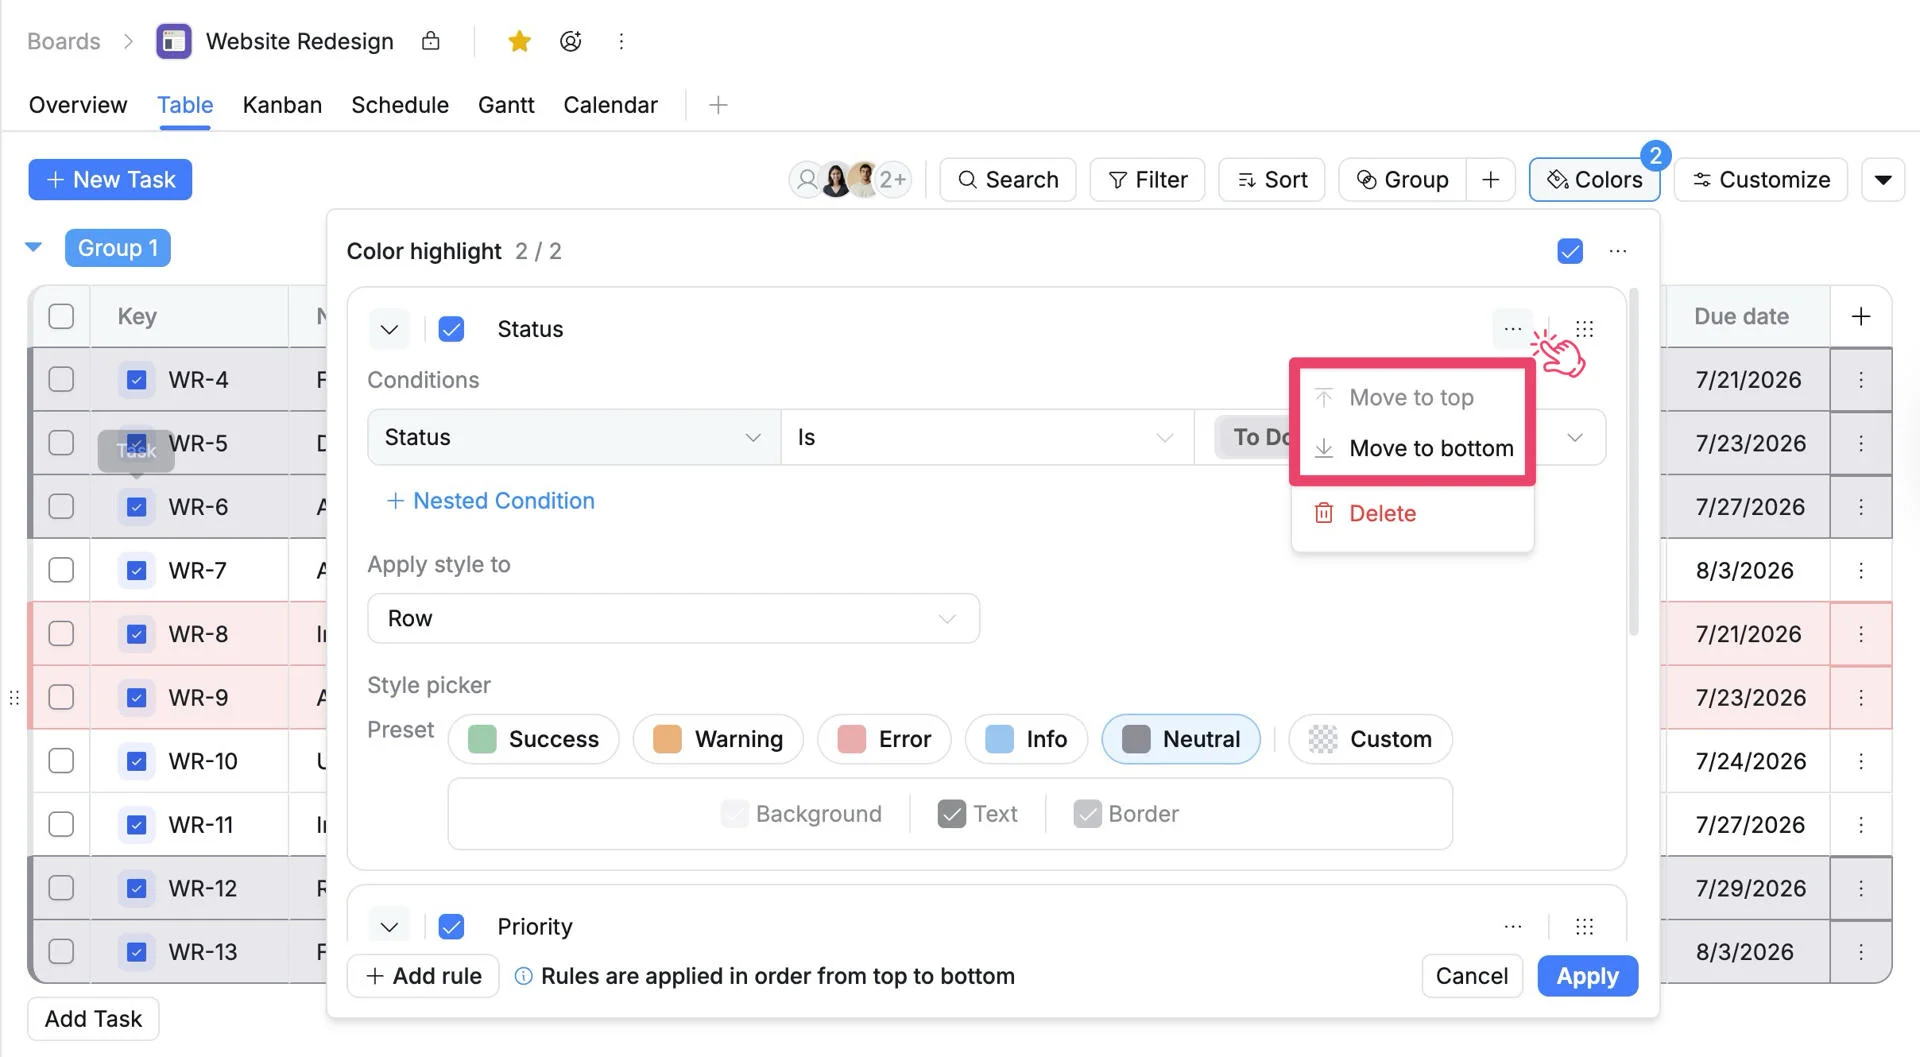
- Find the specific color rule you want to reorder.
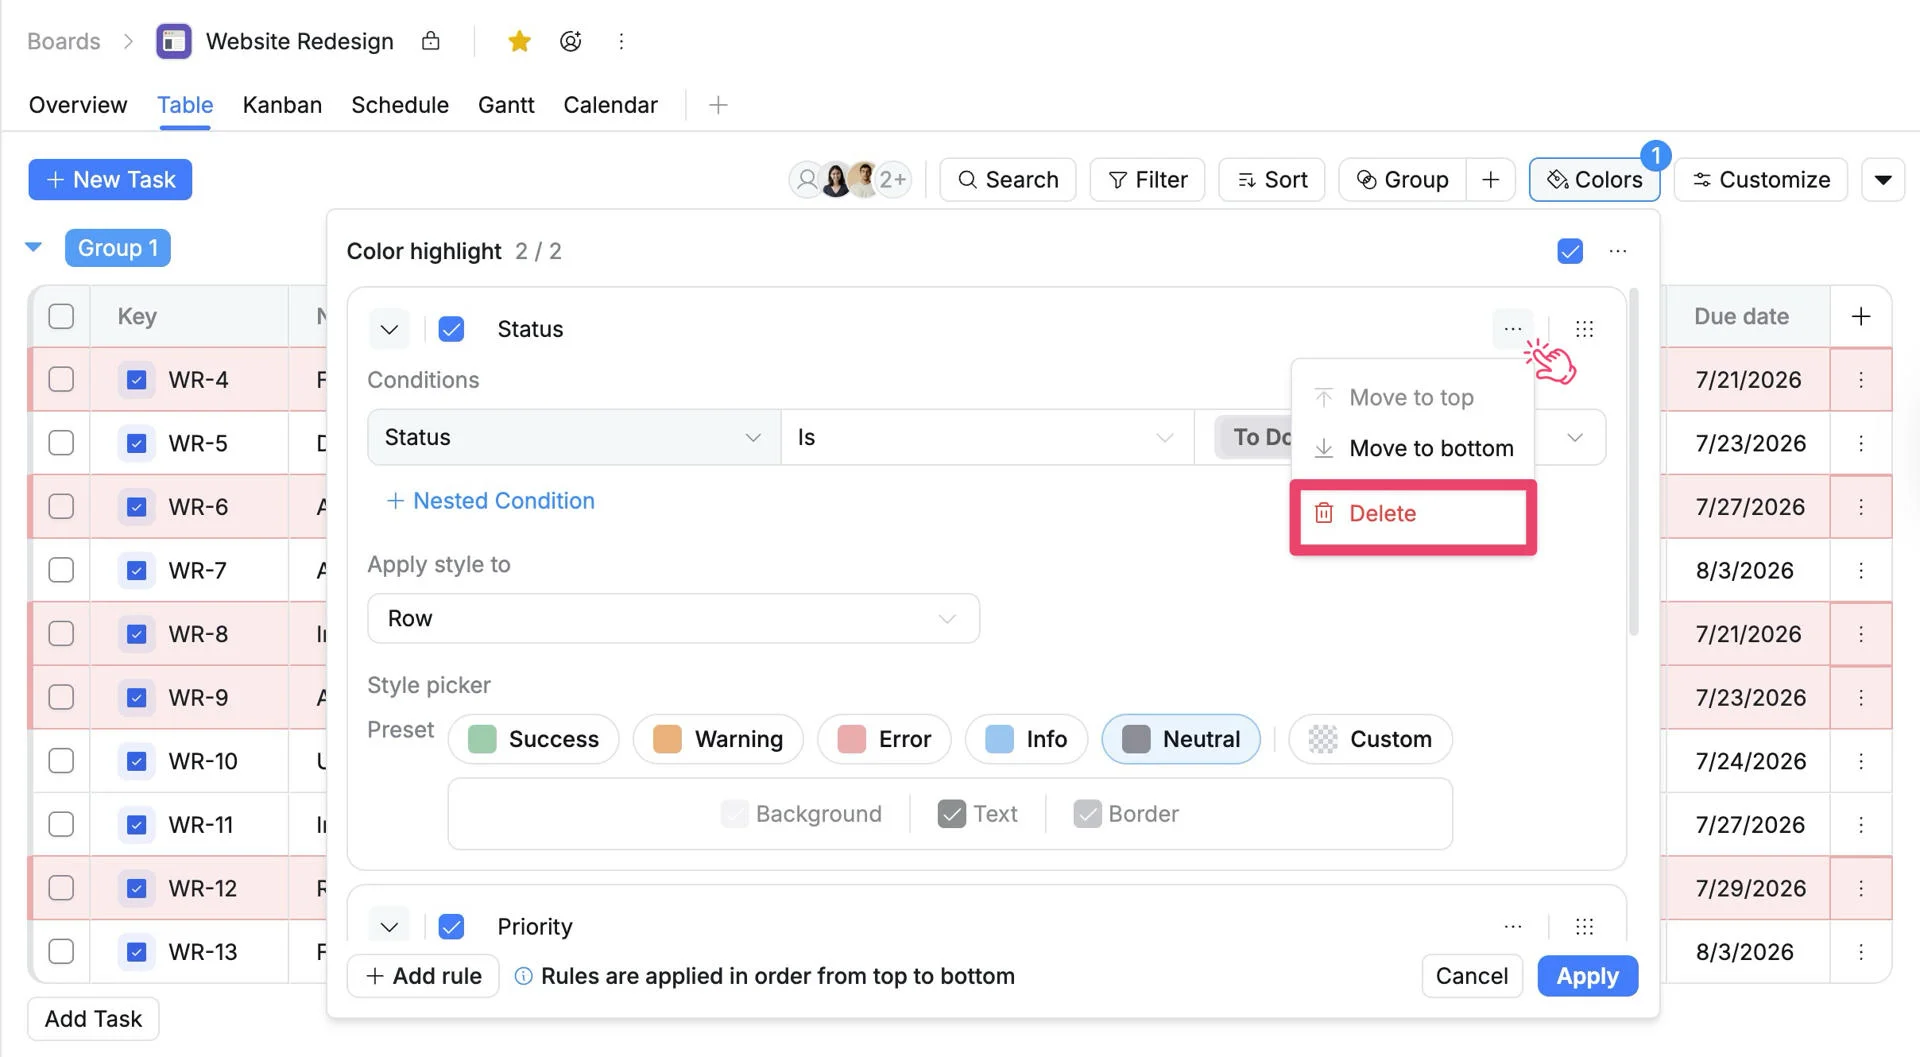
- Click the three dots (⋯) icon next to it to reveal the action menu.
- Click either Move to Top or Move to Bottom to instantly send the rule to the top or bottom of the priority list without dragging.
Enable or disable a rule
You can temporarily turn a rule off without deleting it. This is useful when you want to pause a rule during a specific period without losing its configuration.
To toggle a rule on or off:
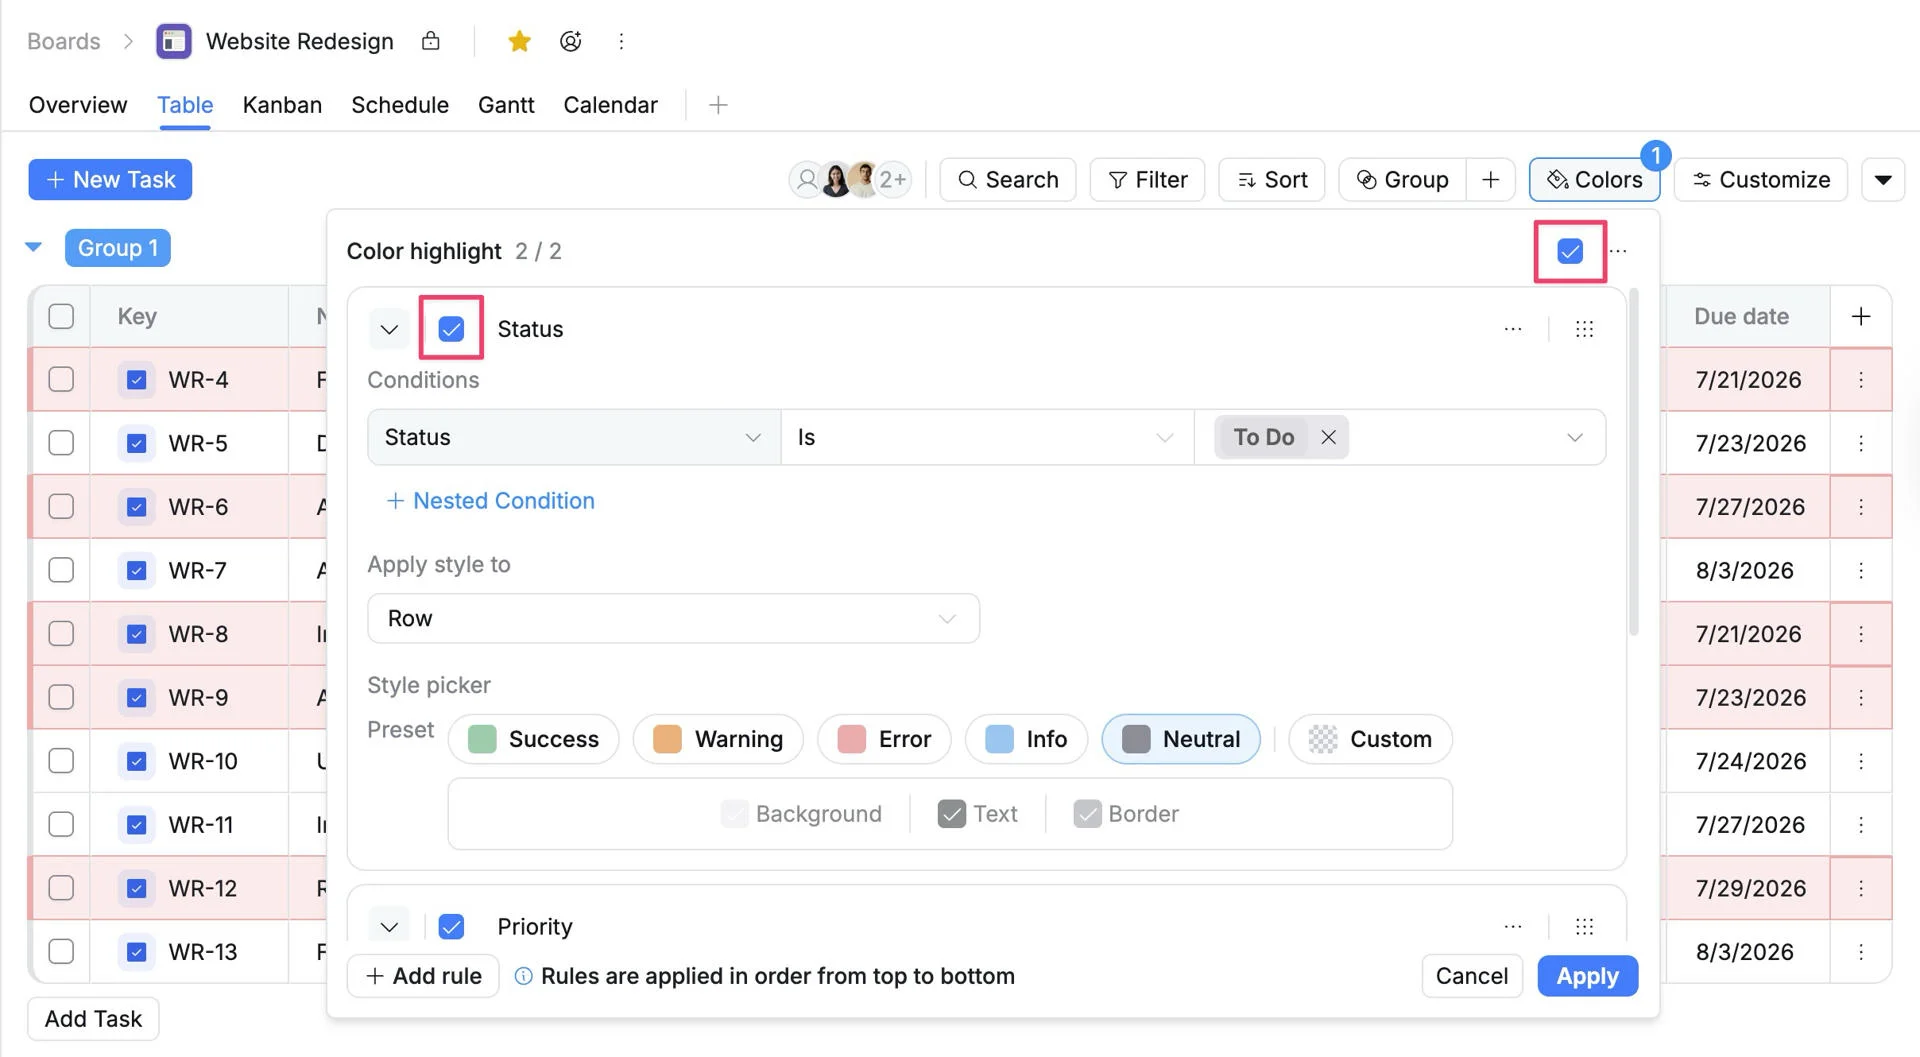
- Single rule: Click the checkbox next to the rule name. A checked box means the rule is active, and an unchecked box means it is paused.
- All rules: To disable all rules at once, click the checkbox in the top-right corner of the Color Highlight panel.
After toggling, click Apply to confirm and update your Table view.
Delete a color rule
You can remove a single color rule permanently if it’s no longer needed:
- Open the Color Highlight panel in Table view.
- Locate the rule you want to delete.
- Click the three dots (⋯) icon next to the rule to open the action menu.
- Select Delete.
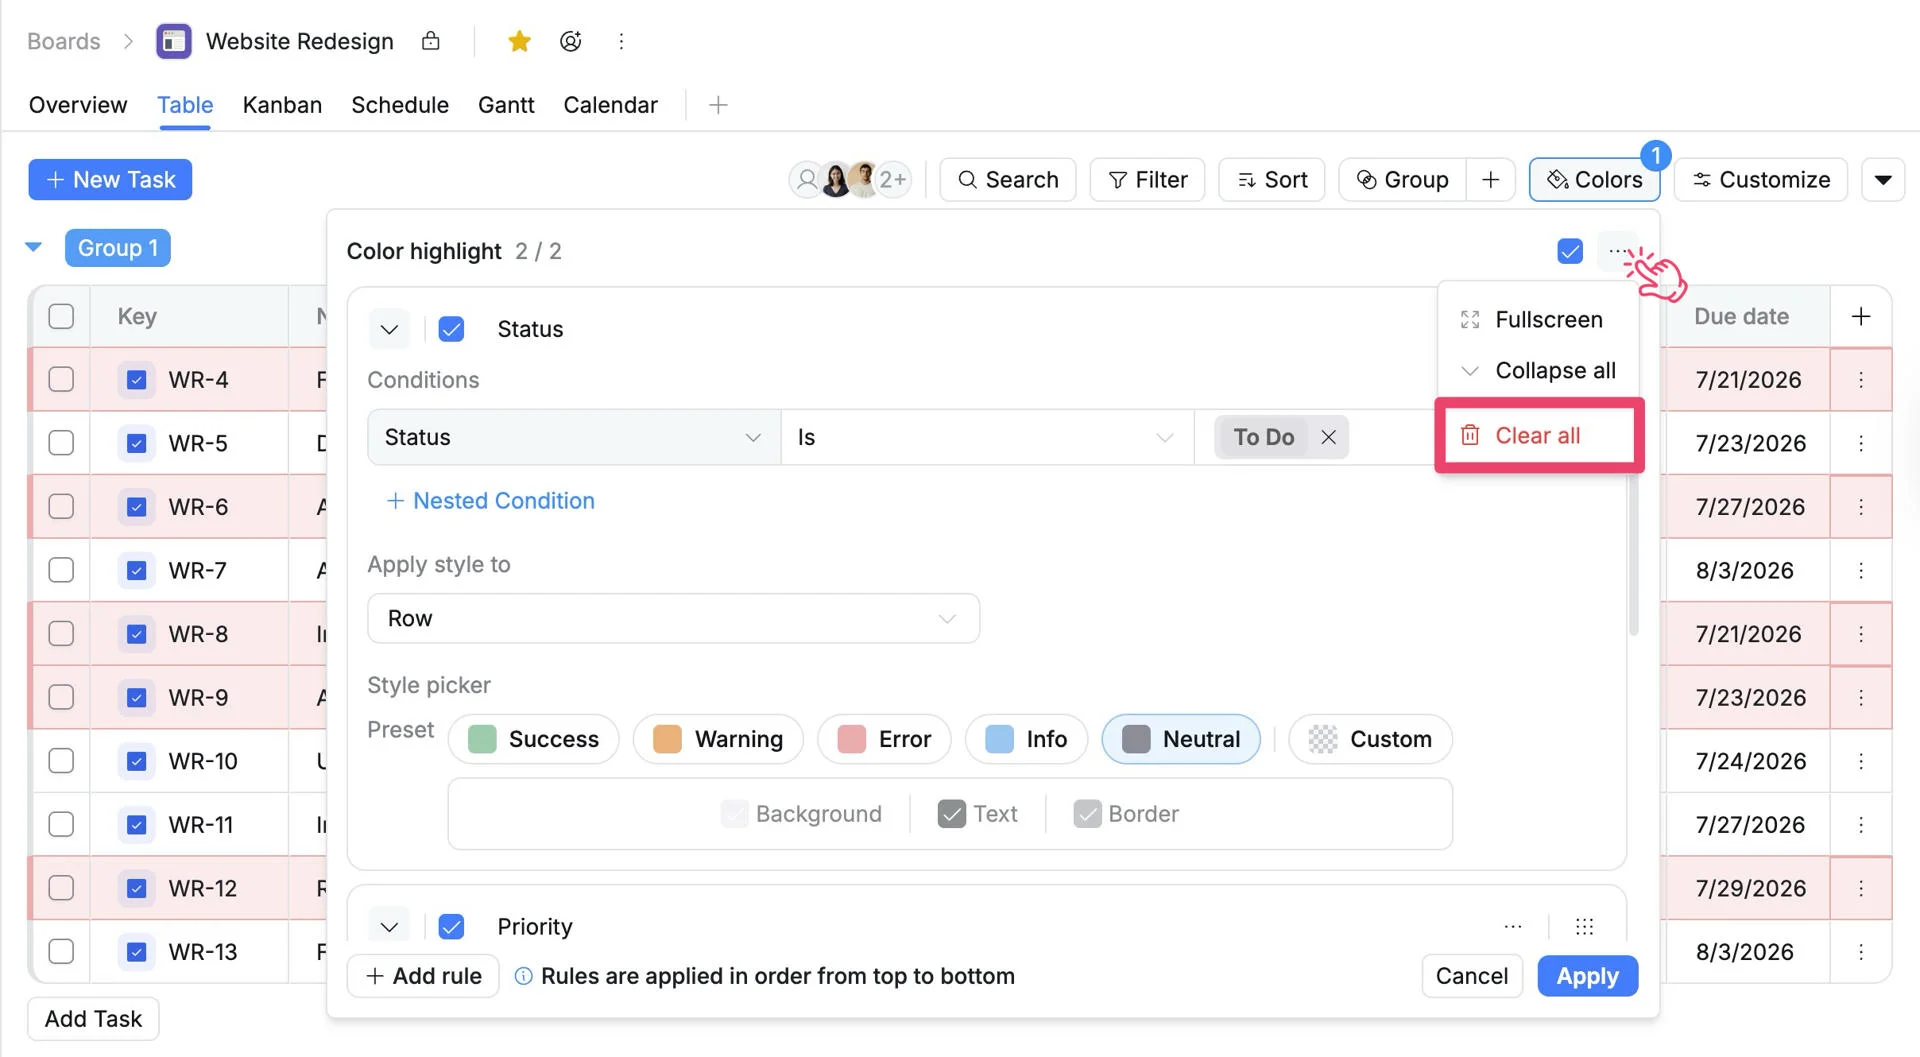
Delete all color rules
If you want to remove all color rules at once:
- Open the Color Highlight panel in Table view.
- Click the three dots (⋯) menu in the top-right corner of the panel.
- Select Clear all.