Board custom fields
Manage custom fields on your board to capture project-specific information and tailor it to your team’s needs.
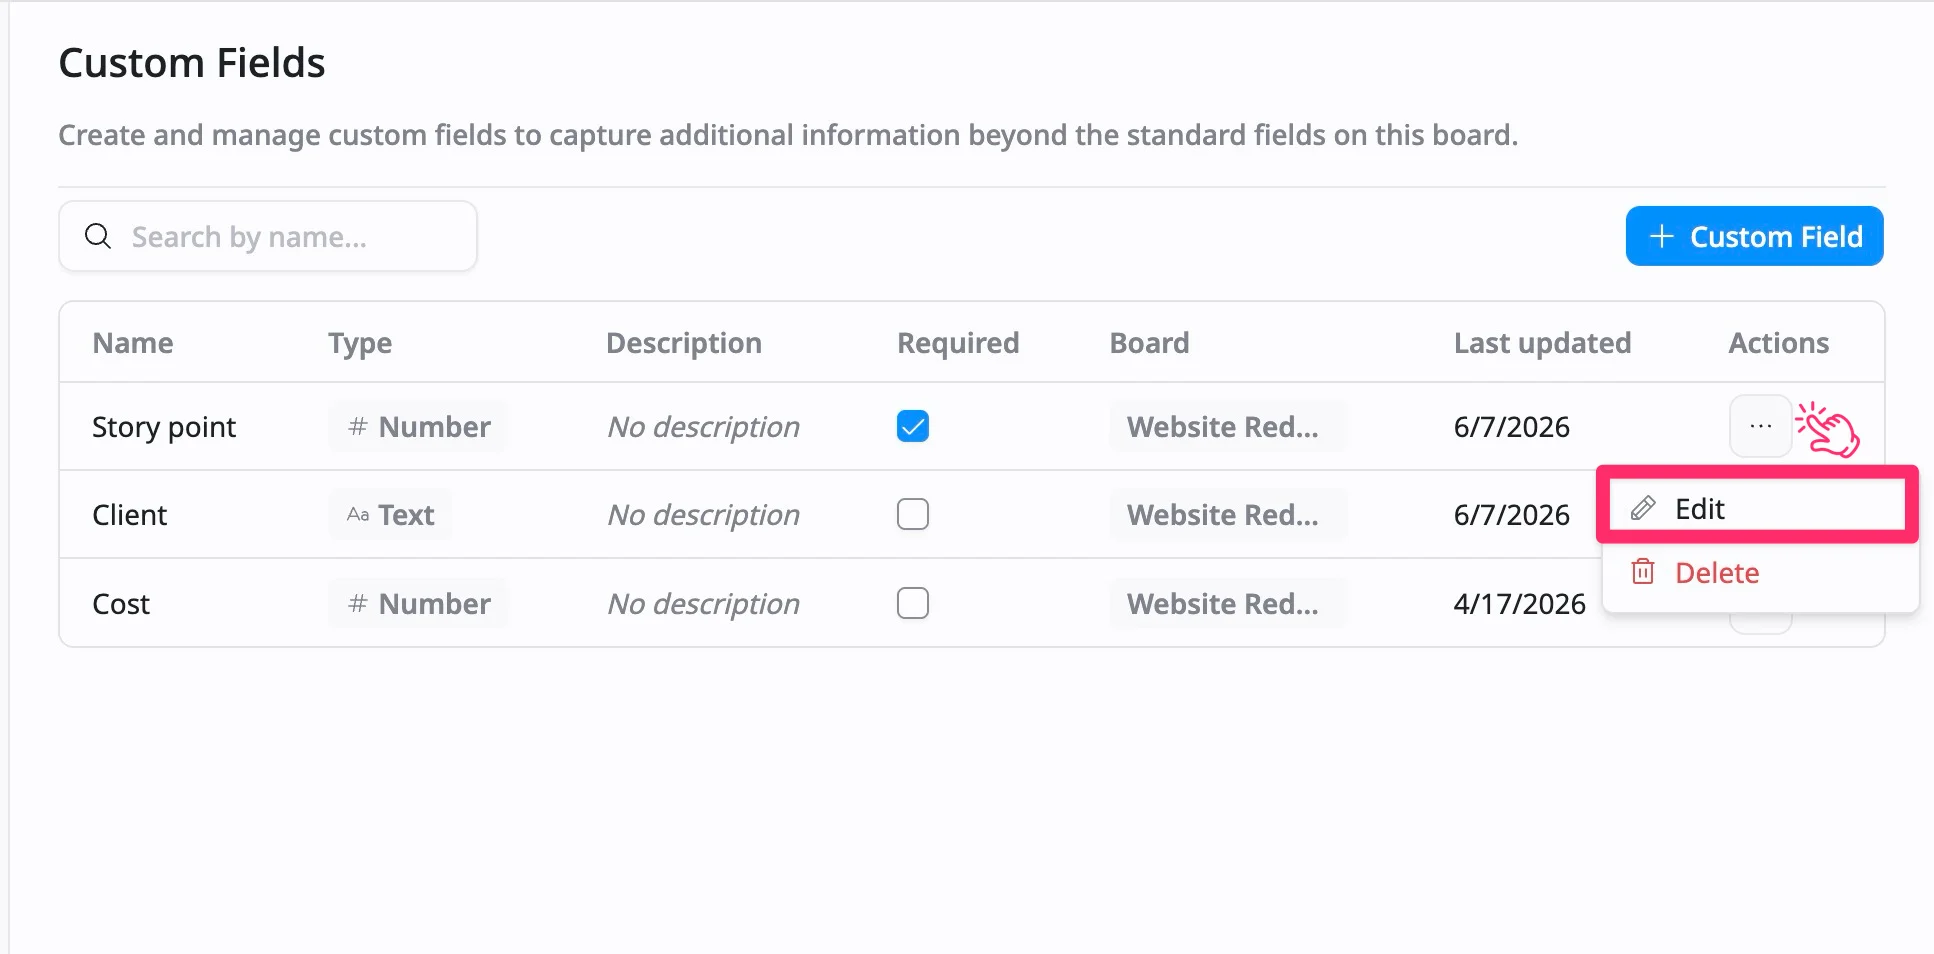
The custom fields tab lets users create and manage custom fields that capture additional information specific to their board. The table displays:
- Name: The custom field’s name.
- Type: The type of data (e.g., number, text).
- Description: Any description or details about the field (if provided).
- Required: Indicates if the field is required for tasks.
- Board: Specifies which board the field belongs to (Global or Board-specific).
- Last updated: The date when the field was last modified.
- Actions: Options to edit or delete custom fields.
This section helps you tailor your project tracking by adding and managing custom fields that are relevant to your team’s needs.
Access the Board custom fields
- Navigate to the Board settings page
- Select the Custom Fields tab from the left-hand menu.

Custom fields in the task details view
In the task details view, custom fields are shown under the More fields section, allowing you to view and update project-specific information directly within the task.

Search for custom fields
To search for custom fields, click the search bar and type the field name. This enables you to locate and manage specific custom fields within the board quickly.

Types of custom field
TaskFord gives you flexibility in how you apply custom fields:
- Global fields: Use Global fields when you want to standardize data across your entire site. These fields will be available on all boards.
- Board-specific fields: Create data fields that only appear on your current board.
Create a custom field
To create a new custom field, follow these steps:
- Click + Custom Field button in the top-right corner.

- Fill in the Create Field panel:
- Field name: Enter a clear and descriptive name (e.g., Priority, Budget, Client)
- Field type: Choose the format of your data:
- Text: For notes or labels (e.g., Client name)
- Number: For values like cost or effort
- Date: For deadlines or milestones
- Description (optional): Add guidance to help your team understand how to use this field
- Scope: The custom field will only apply to the current board
- Advanced settings
- Required: Enable this option to make the field mandatory when creating or updating tasks
- Default value: Set a predefined value to standardize task data
- Click Save to finalize the field.

To create fields that apply across multiple boards or the entire workspace, go to: Site Settings → Custom fields.
Edit a custom field
To edit a board-specific custom field:
- Click the three dots (…) on the row of the field you want to edit.
- Select Edit from the dropdown menu.
- Update the information in the Edit Field panel.
- Click Save to apply your changes.
To edit the Global custom fields, go to: Site Settings → Custom fields.
Delete a custom field
To delete a board-specific custom field:
- Click the three dots (…) on the row of the field you want to delete.
- Select Delete from the dropdown menu.
- In the confirmation dialog, click Delete to remove it or Cancel to keep it.

The deleted custom field will be removed from the board and will no longer appear in the task details view.