Configure your board
Learn how to customize your TaskFord board settings, including workflow, permissions, and custom fields, for efficient task management.
Once your board is created, customize its settings to match your team’s workflow. Set up structure, permissions, workflow/s, and data fields to ensure everything is organized from the start.
Access Board settings
You can access Board settings in two ways:
Option 1: From the sidebar
- Locate the Board in your sidebar.
- Click the three vertical dots (⋮) that appear next to the board name.
- Select Settings from the dropdown menu.

The sidebar displays only recent boards. If you can’t find the board you’re looking for, click View all boards to browse the full list.
Option 2: From the board header
- Open the desired Board space.
- Click the three vertical dots (⋮) in the board header.
- Select Settings from the dropdown menu.

Once inside the settings panel, use the left-hand menu to navigate the following customization categories:

Configure board settings
1. General
Manage the foundational identity of your project to ensure team clarity:
- Change icon: Upload a custom image or choose from existing avatars to visually represent your board.
- Board name: Update the primary title of your project.
- Key: Modify the short identifier (e.g., “MA”) used for task IDs and linking.
- Description: Provide a summary of the board’s purpose for your team to reference.

2. Access
Control who can access your board and what they can do:
Board privacy
Choose a privacy level to control who can access this board
- Open: Open access for everyone within your site.
- Limited: Visible to everyone, but only invited members can create or edit tasks.
- Private: Restricted access; visible only to admins and invited members.
Member management
- View members: Review a list of all users who currently have access to your board and verify their assigned roles.
- Assign/Change roles: Adjust an active member’s role (e.g., Admin, Editor, Viewer, or custom roles) to update their specific board privileges.
- Add People: Click the Add People button to invite new members and assign them a specific role (Admin, Editor, or Viewer).
- Remove members: Remove users from the board list if they no longer require access or project visibility.

3. Custom fields
Custom fields allow you to capture information beyond standard task attributes, helping your team track the data that matters most for your projects.
TaskFord gives you flexibility in how you apply custom fields:
- Global fields: Use Global fields when you want to standardize data across your entire workspace. These fields will be available on all boards.
- Board-specific fields: Create data fields that only appear on your current board.

How to create a new custom field:
- Click + Custom Field in the top-right corner.
- Fill in the Create Field panel:

- Field name: Enter a clear and descriptive name (e.g., Priority, Budget, Client)
- Field type: Choose the format of your data:
- Text: For notes or labels (e.g., Client name)
- Number: For values like cost or effort
- Date: For deadlines or milestones
- Description (optional): Add guidance to help your team understand how to use this field
- Scope: The custom field will only apply to the current board
- Advanced settings
- Required: Enable this option to make the field mandatory when creating or updating tasks
- Default value: Set a predefined value to standardize task data
- Click Save to finalize the field.
To create custom fields that can be used across multiple boards, navigate to Site Settings. Learn how to manage custom fields across your site.
4. Workflow
A workflow in TaskFord is the sequence of statuses that a task moves through from creation to completion. It defines how work progresses and helps your team understand what stage a task is in and what happens next.
At the board level, you can choose how your workflow is set up:
- Inherit site workflow: Use the default workflow defined at the workspace level.
- Custom workflow: Create a board-specific workflow tailored to your team’s process

How to add a new status
To customize your workflow, you can add new statuses:
- Click + Add Status under the desired category: To Do, In Progress, or Done.
- Enter the name for your new status in the field.
- Press Enter to apply the change and add the status to your workflow.
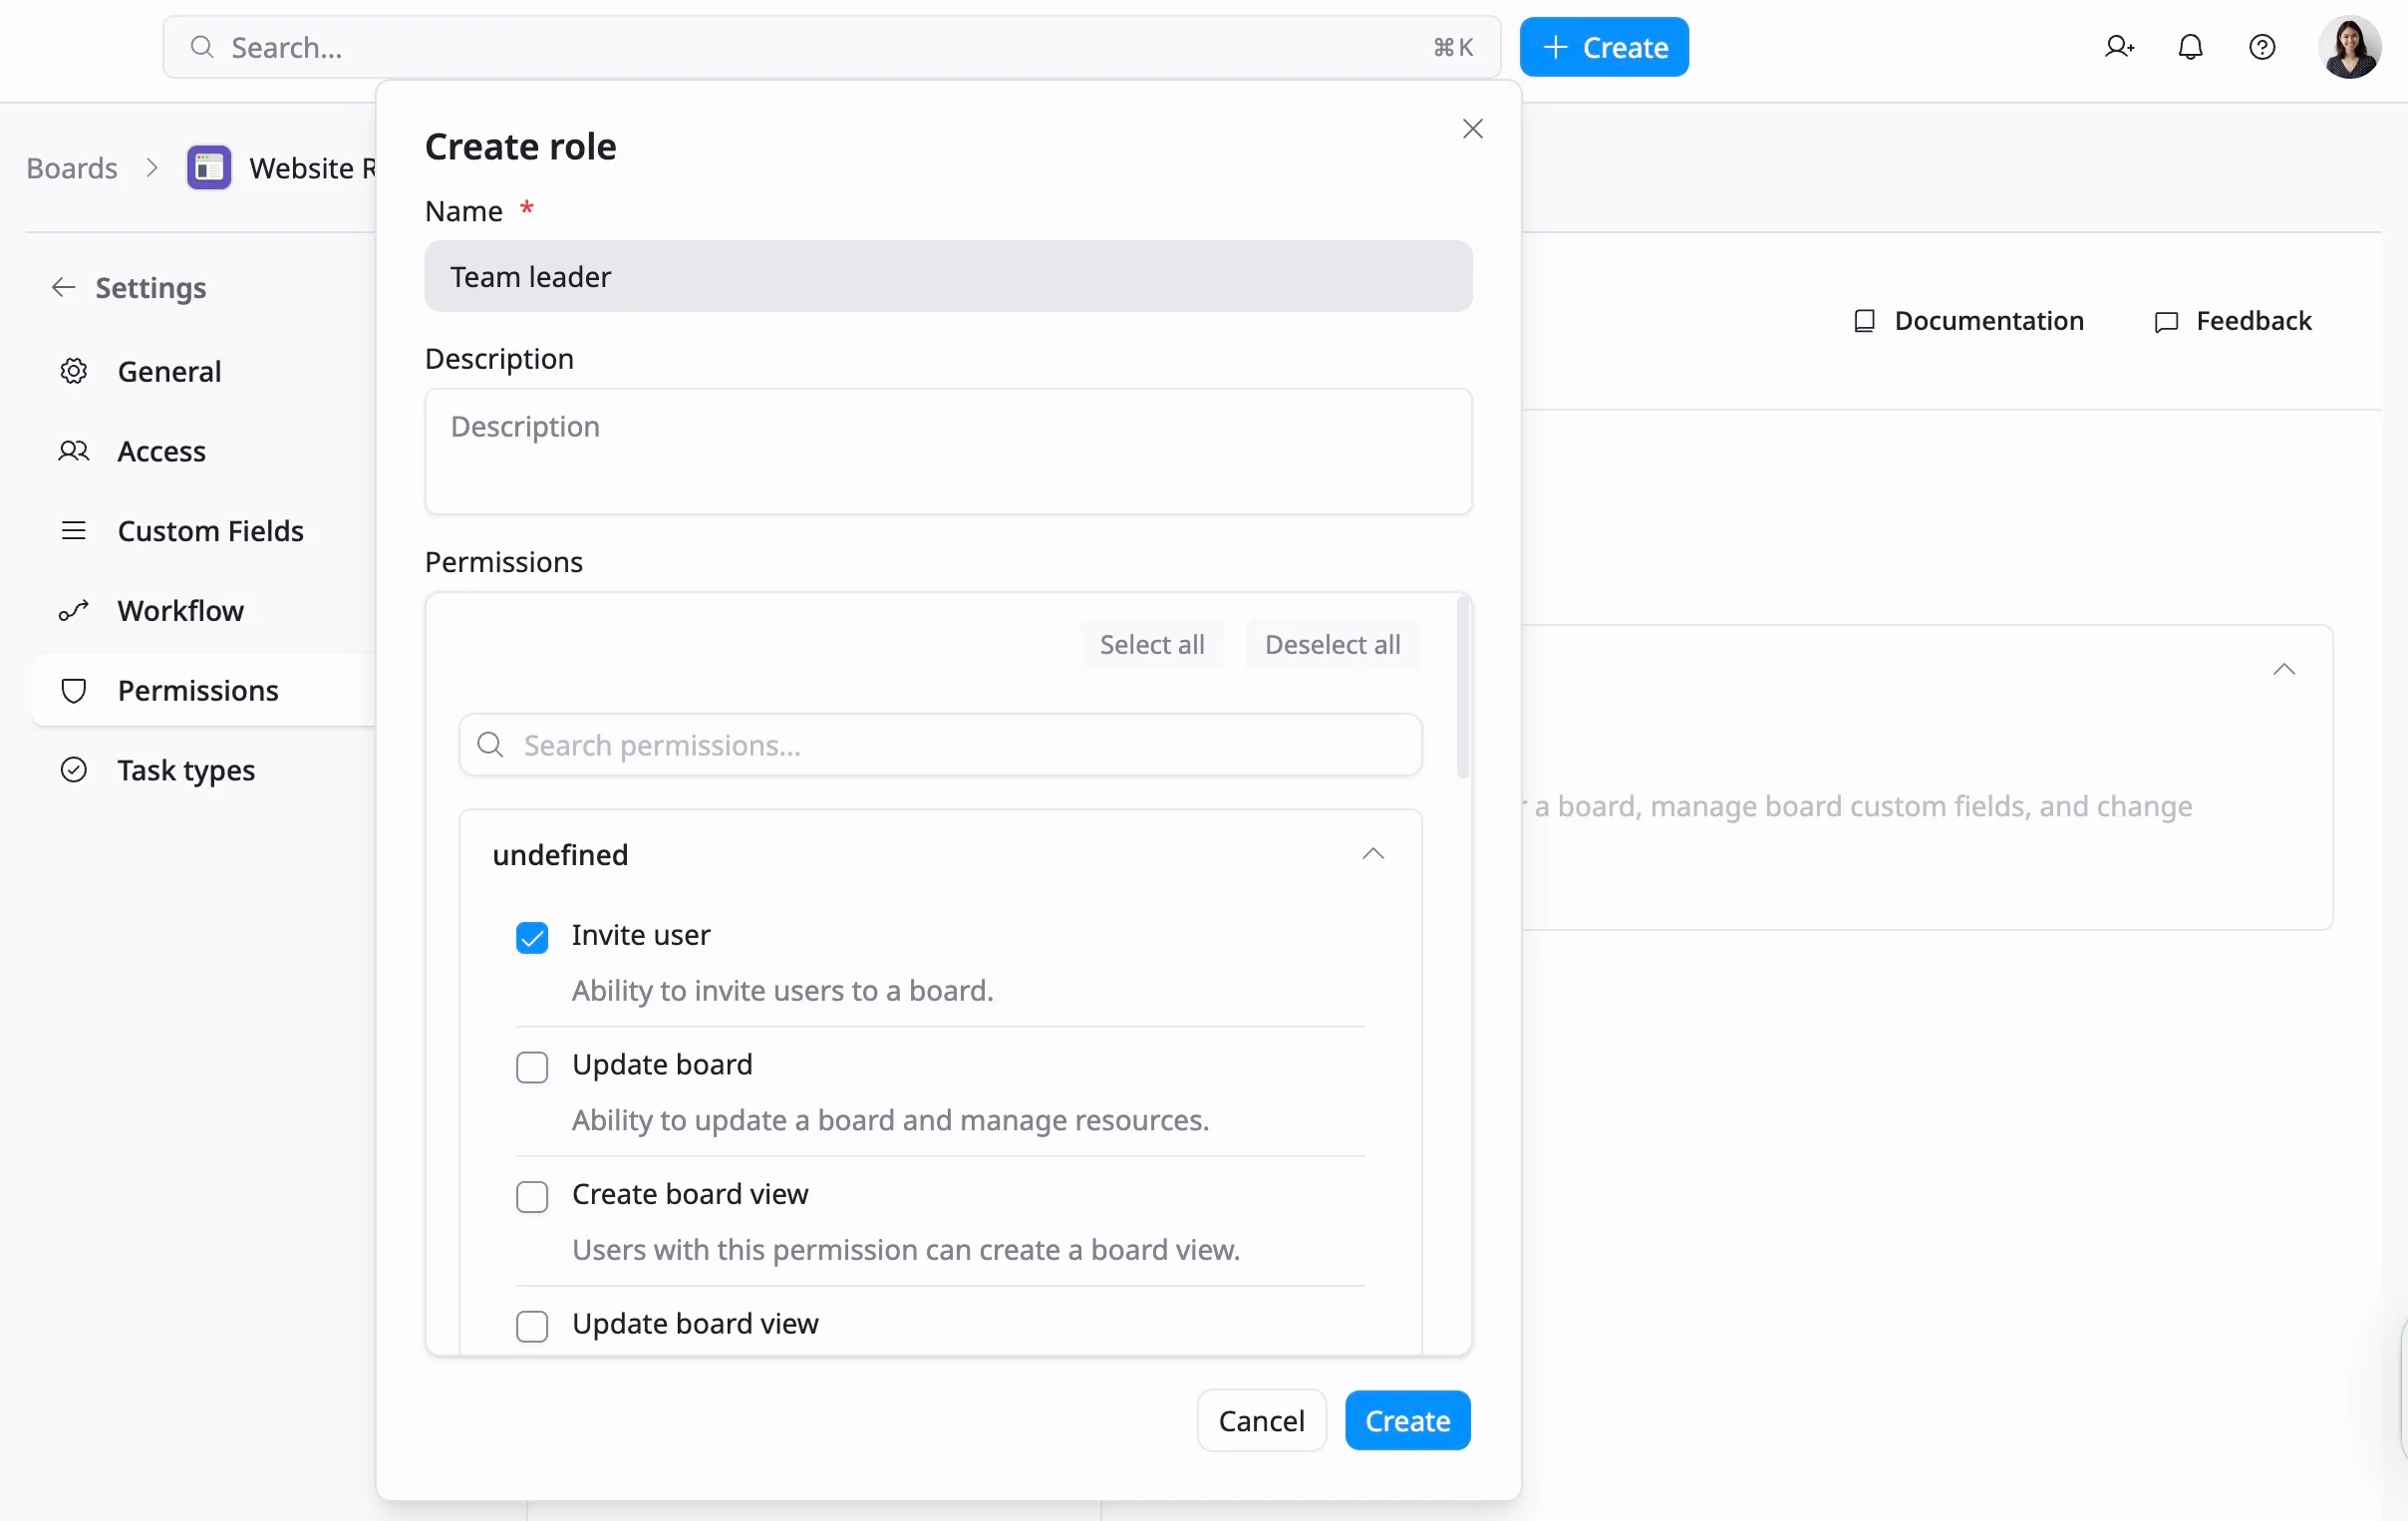
5. Permissions
Define exactly what users can do based on their assigned roles.
- Standard roles: Review fixed permissions for Admins, Editors, and Viewers.
- Custom roles: Create tailored roles with specific capabilities, such as the ability to manage custom fields or change board visibility.

How to create a custom role
- Click + New Role.
- Provide a Name and Description.
- Tick the checkboxes for specific permissions you wish to grant.
- Click ‘Create’ to add the role.
6. Task types
Manage which types of tasks are used in your project, such as Tasks, Subtasks, or Milestones.

To create a new task type for your board, you first need to configure it in the Site settings. Learn how to manage custom task types across your site.