Import tasks from CSV
Learn how to import tasks from a CSV file into TaskFord boards. Quickly turn existing spreadsheets into structured, trackable work items with a simple upload.
- Board Admins / Board Editors can import data into boards.
- App Admins / App Editors can import data into boards, but only on Open boards.
You can easily import tasks from a CSV file into your board to turn existing spreadsheets into structured, trackable work in TaskFord. This helps you move data quickly, reduce manual setup, and start managing your tasks in one place.
Follow this guide to learn how to prepare your CSV file, map fields correctly, and complete the import process step by step.
Prepare your CSV file
Before importing, ensure your CSV is correctly formatted. Each row represents one task, and each column maps to a field in TaskFord.
Required Field
- Name: The task title or short description. Every row must include this field.
Optional Fields
- Description: Additional details about the task.
- Start Date: When the task begins. Use a supported date format (e.g.,
YYYY-MM-DD...) - End Date: Task deadline or completion date. Must use the same format as Start Date.
- Status: The task’s current stage. Map values in your CSV (e.g., “To Do”, “In Progress”, “Done”) to statuses in your TaskFord board.
- Priority: The urgency tier of the task. Use
High,Medium, orLow. - Group: The specific category, sprint, or task group the item belongs to.
- Assignee: The person responsible for the task. The name or email address must exactly match a user in your TaskFord workspace for the assignment to apply.
- Color: Color tags used for visual organization or categorization on your board.
- Task Key: Unique identifier for tracking and linking tasks.
- Parent Key: When importing subtasks, it is critical to link them correctly to their parent tasks. Ensure the of the parent task is exact for subtasks to link to the correct parent task.
How to import a CSV file to the board
Once your CSV file is ready, you can initiate the import in TaskFord:
- Go to the desired Board where you want to import tasks.
- In the board header, click the three vertical dots (⋮).
- From the dropdown menu, select Import tasks from CSV.
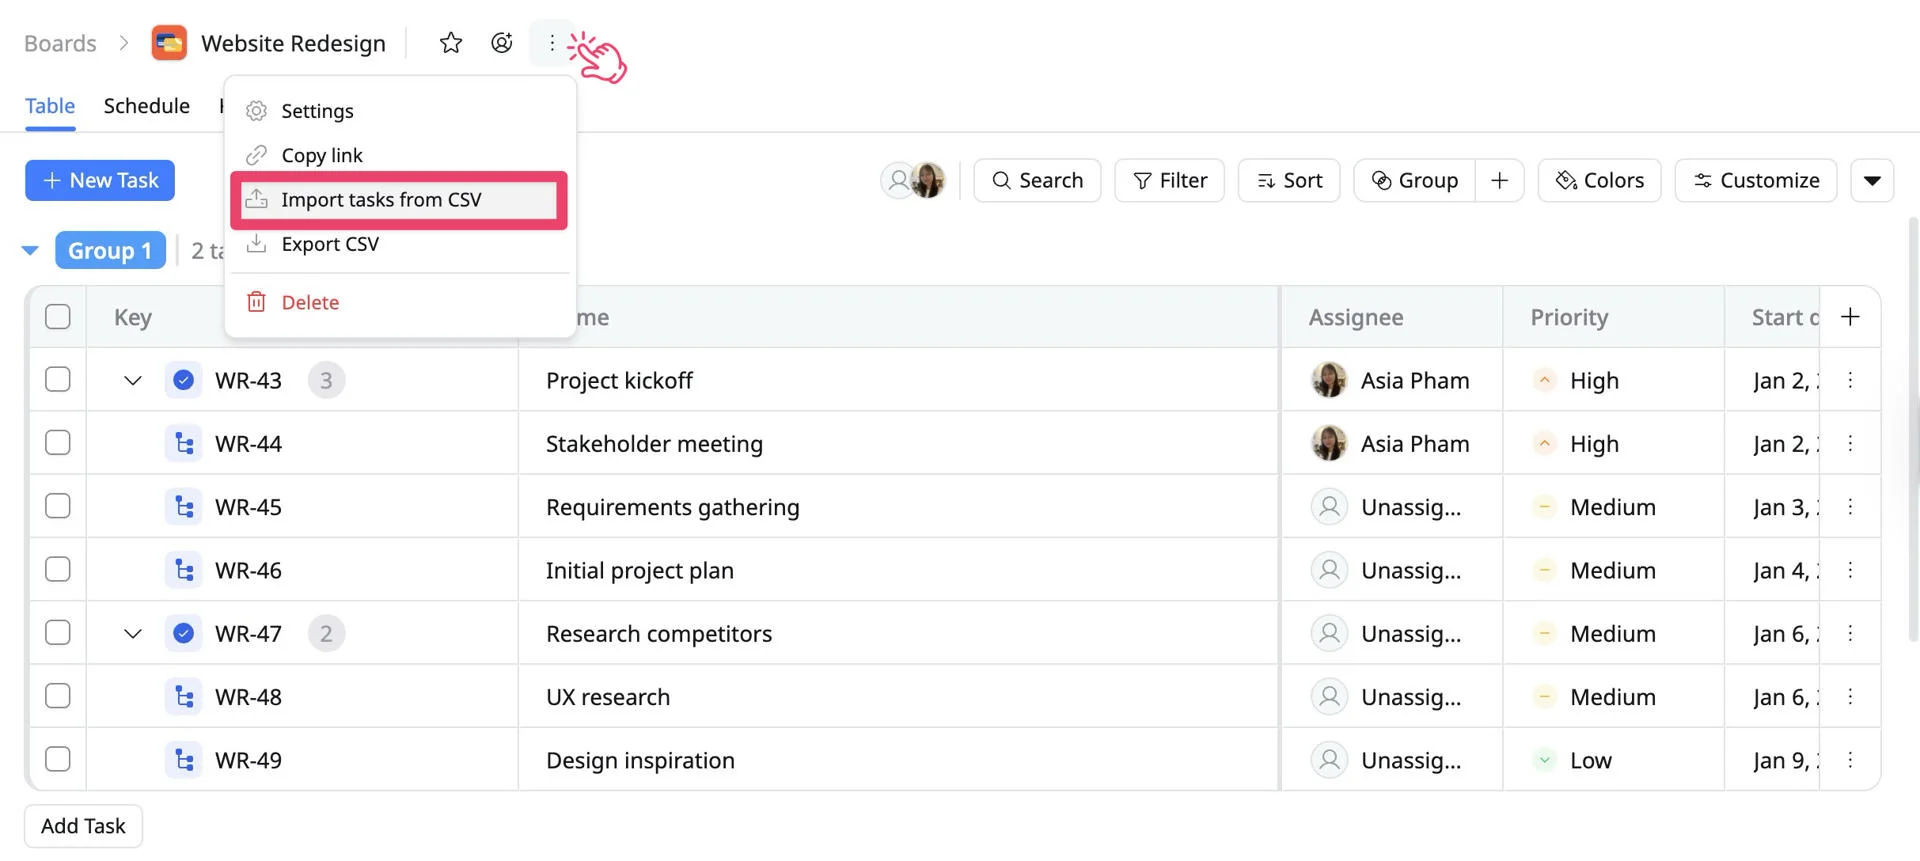
Once you click on “Import tasks from CSV”, you will be redirected to a new screen to proceed set up, please follow these steps to do:
Step 1: Choose your board
Select the destination board where you want the task to be imported from the CSV file.
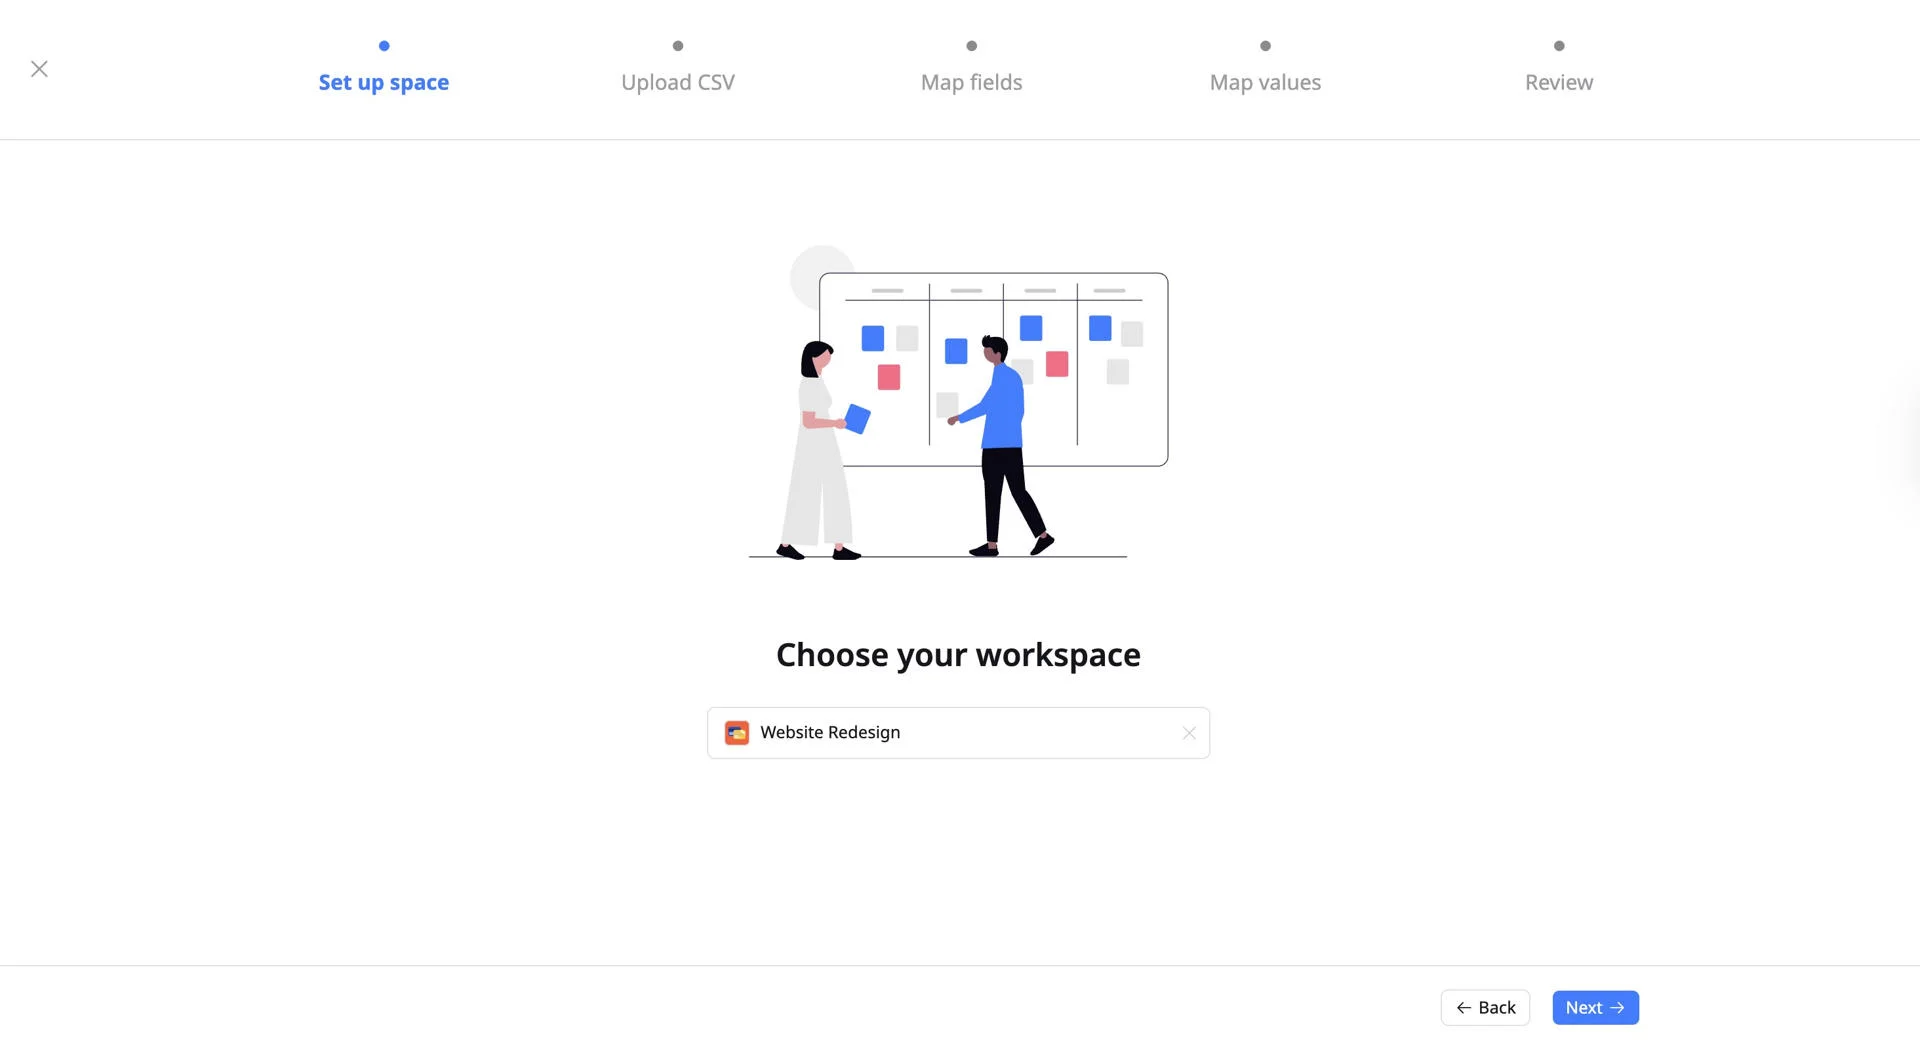
Click Next to proceed.
Step 2: Upload CSV file
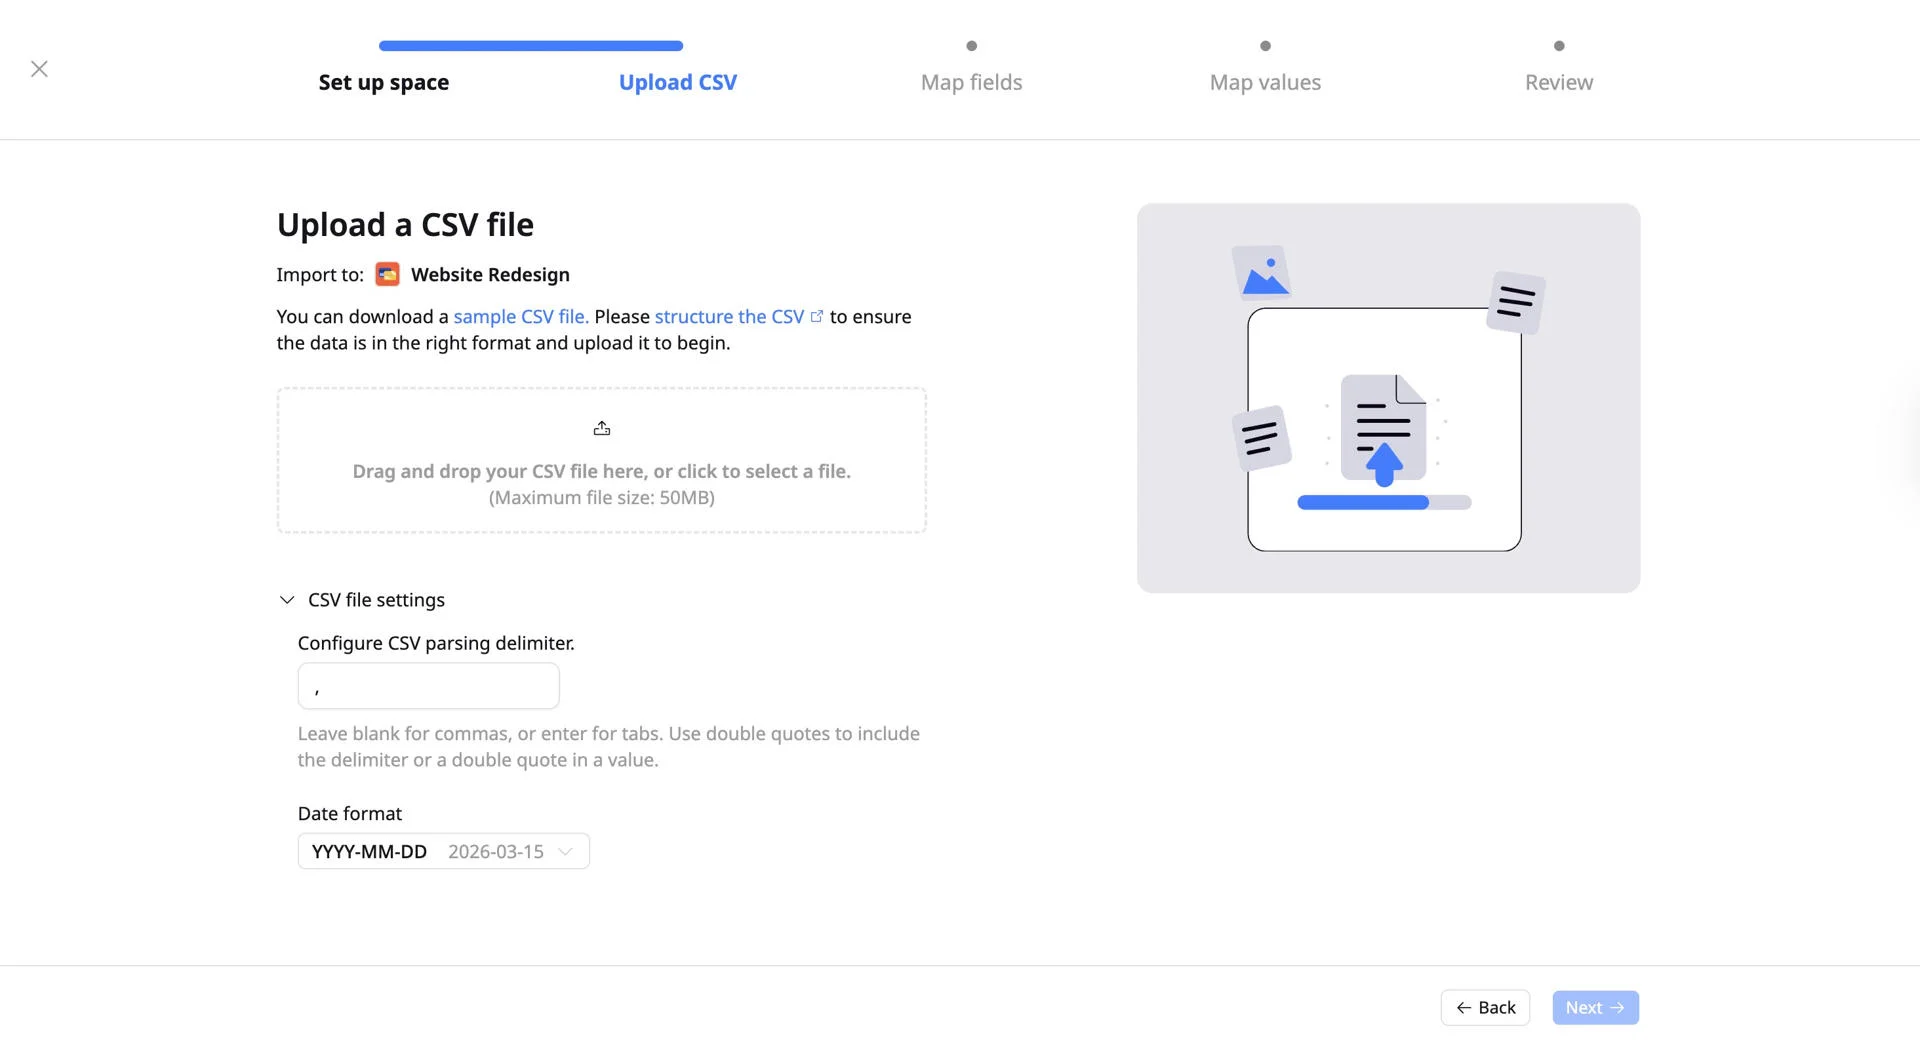
2.1. Upload a CSV file: Drag and drop your file into the box, or click the upload icon to select a file from your computer (Max size: 50MB).
2.2. Configure CSV settings: Ensure TaskFord correctly interprets your file by setting the proper delimiter and date formats.
- Delimiter
- This tells TaskFord how your columns are separated. The default is a comma (
,). If your file uses tabs instead, enter\t. - If any of your values contain a comma or a quote character, wrap that value in **double quotes
" "in your CSV to prevent it from being misread.
- This tells TaskFord how your columns are separated. The default is a comma (
- Date Format
- Select the format that exactly matches your CSV data (e.g.,
YYYY-MM-DD) to ensure Start and End dates are read correctly.
- Select the format that exactly matches your CSV data (e.g.,
After configuring the file and dates, click Next to proceed to mapping fields in TaskFord.
Step 3: Map CSV fields to TaskFord fields
TaskFord will automatically attempt to match your CSV columns to TaskFord system fields. You must review this to ensure data lands in the right place.
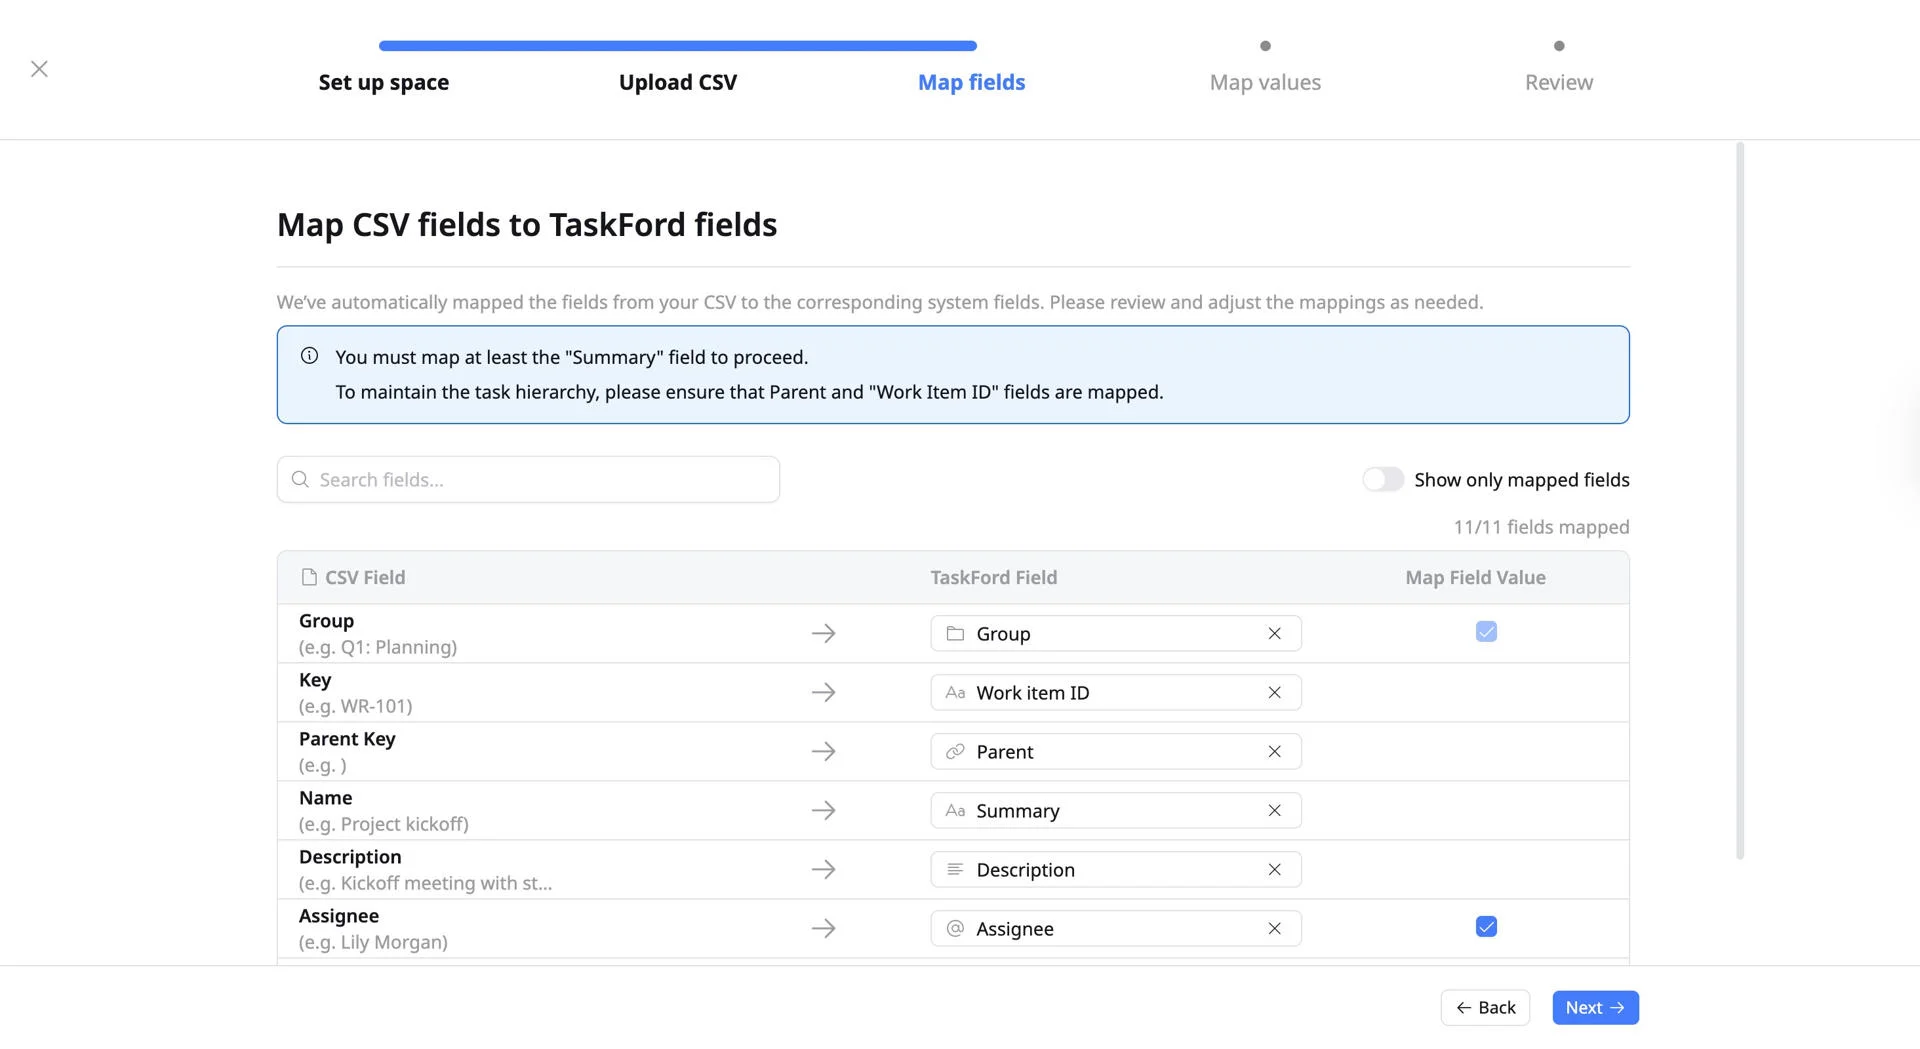
3.1. Review Mappings: Ensure that each CSV field is mapped to the correct TaskFord field. Here are some common mappings you’ll need to check:
- Name → Name
- Status → Status
- Description → Description
- Asignee → Asignee
- Start Date → Start Date
- End Date → End Date …
3.2. Map Field Value: For fields with predefined options like Status, Priority, or Group, check the box next to any field where your CSV values need to match TaskFord’s options.
You’ll configure the value mappings in the next step.
- Toggle Show only mapped fields to hide unmapped columns and focus your review on what’s already been matched.
- Use the Search bar to quickly locate any specific field in your CSV for faster verification.
- Required fields: You must map the Name field to proceed.
- Subtasks: If your CSV includes subtasks, make sure both Work Item ID and Parent fields are correctly mapped to preserve the task hierarchy.
Click Next to continue.
Step 4: Map values in your CSV file
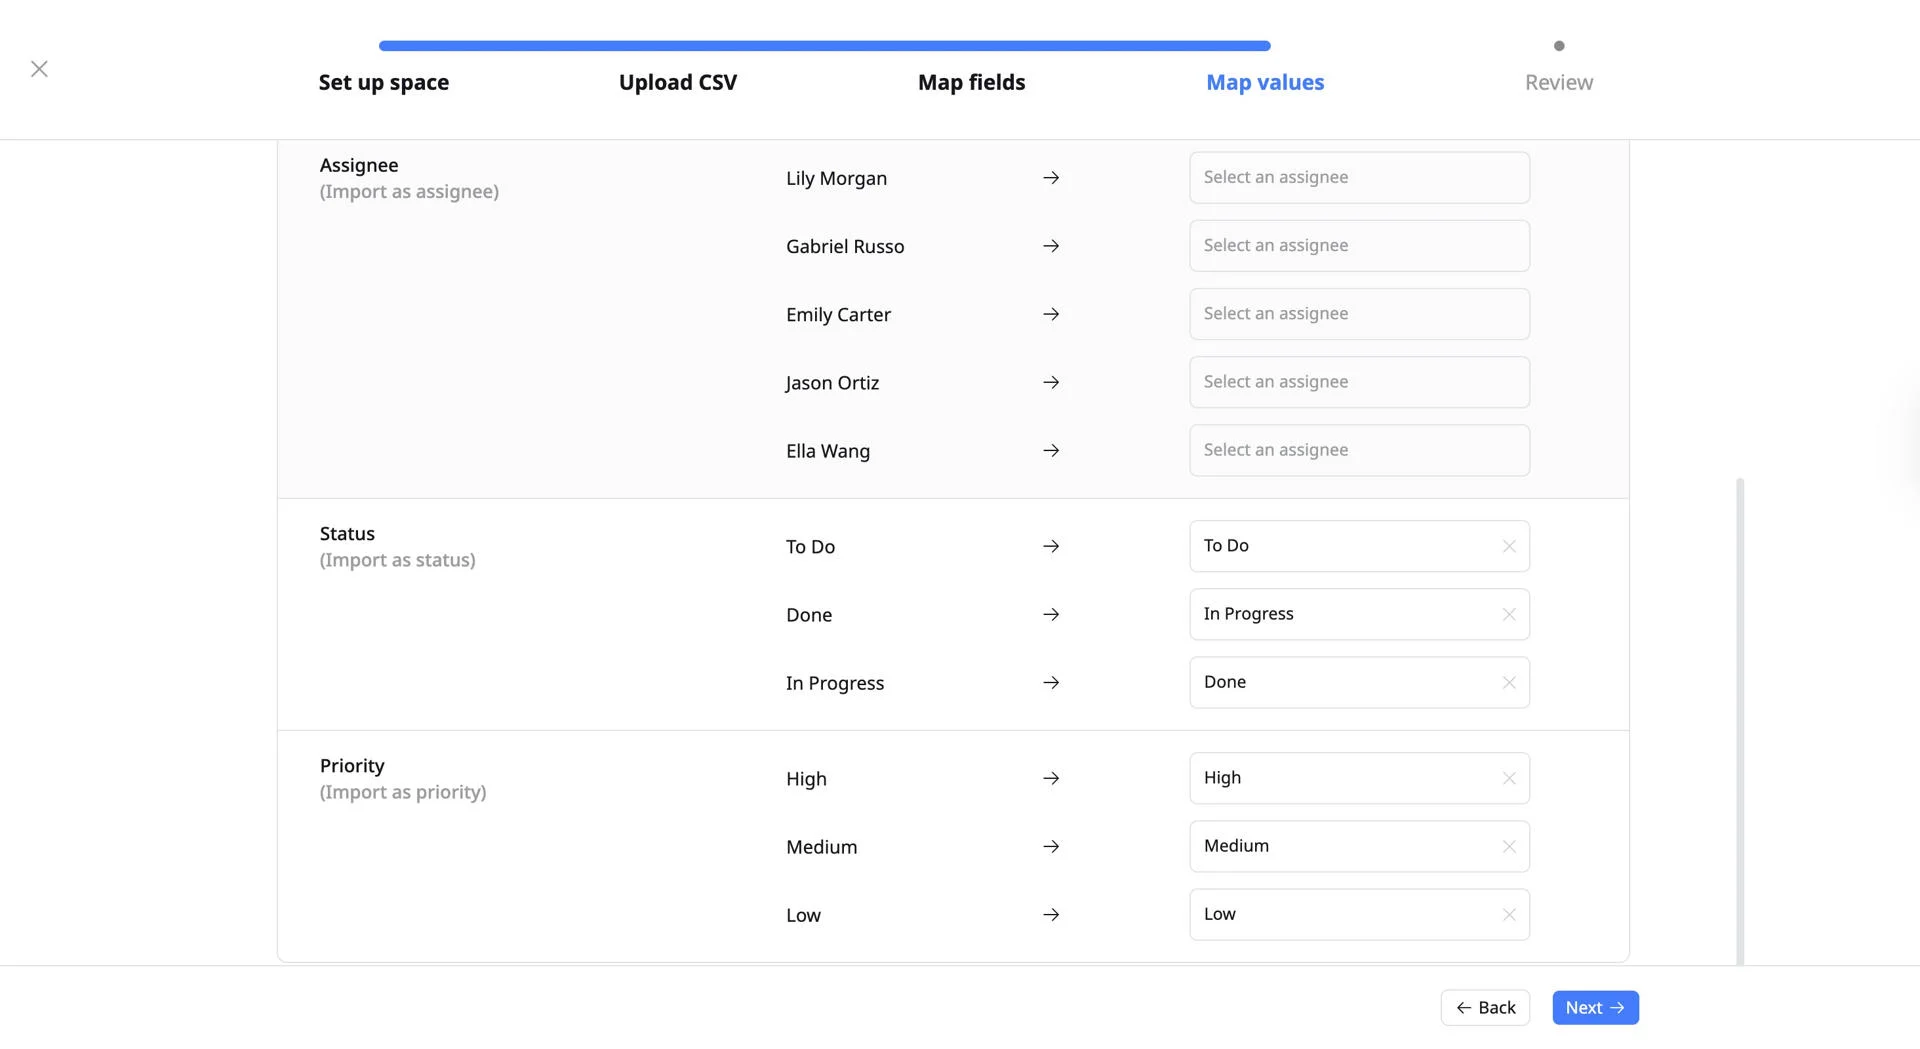
Match each value from your CSV to the corresponding option in TaskFord (for example, mapping your CSV’s “Urgent” to TaskFord’s “High”).
Ensure no value is left unmapped — unmapped values will result in blank fields on your board.
Click Next to continue.
Step 5: Review import details
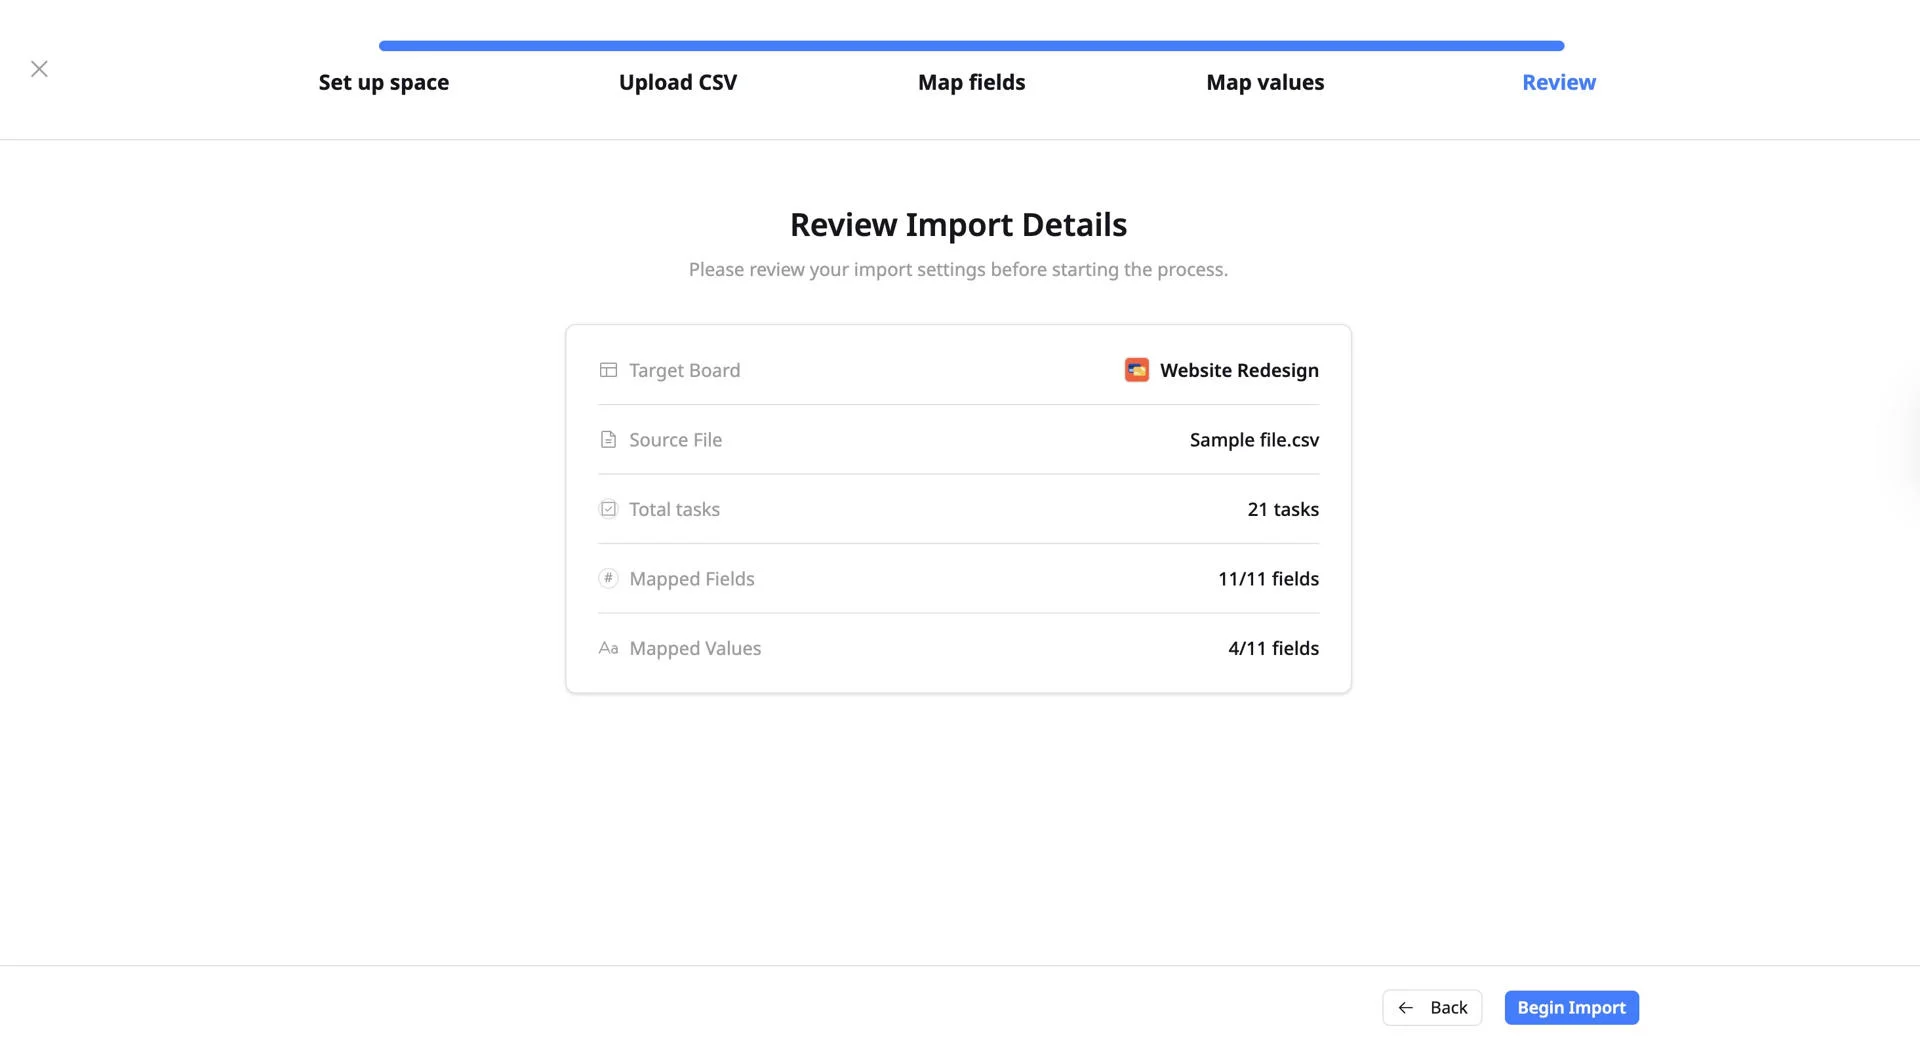
Review the summary to confirm everything looks correct before committing. Check field mappings, value mappings, and task count.
If everything looks good, click Begin Import to start the import process.
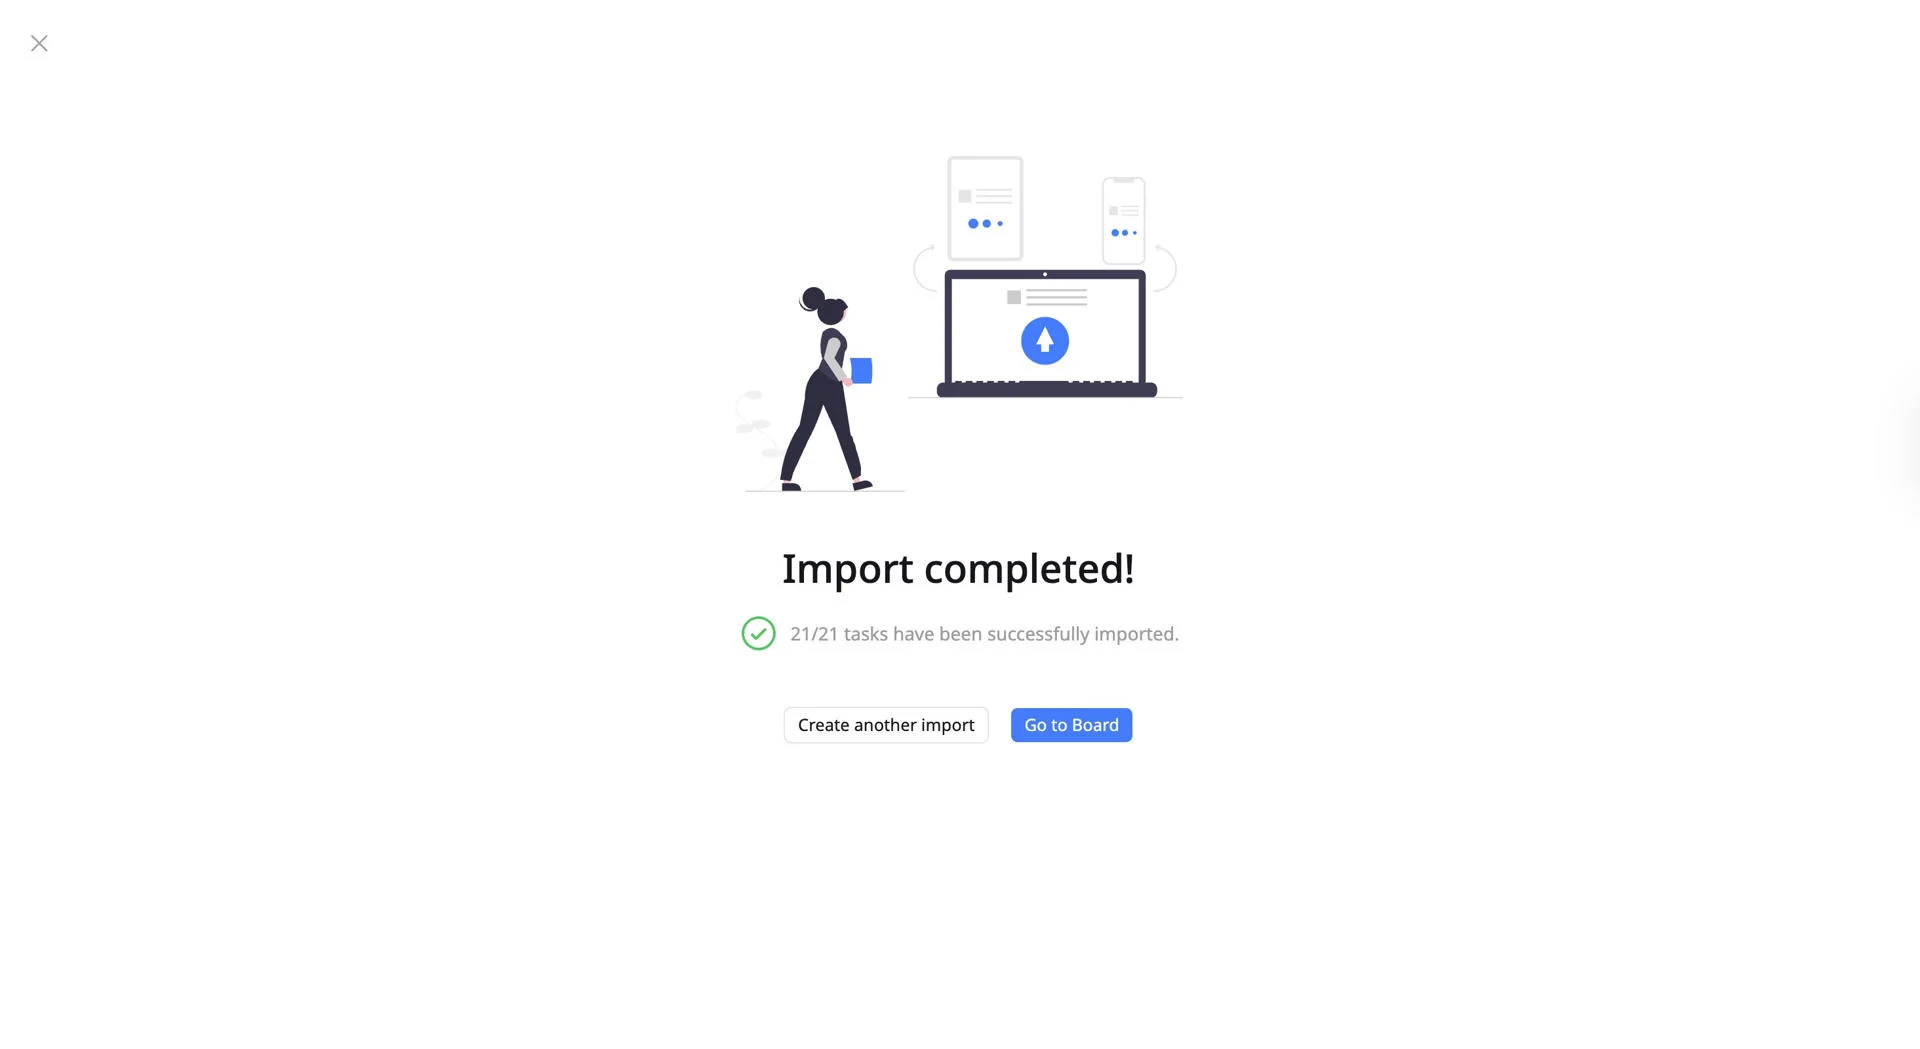
Step 6: Import completed
Once the import finishes, a confirmation screen will show a summary of successfully imported tasks.
From here you can:
- Create another import — to bring in additional CSV files
- Go to Board — to view and start working with your imported tasks