Manage groups in Table view
Learn how to manage groups in Table view. Organize tasks into categories for clearer workflow and better project management.
- Board Admins / Board Editors can manage columns in the Table view.
- App Admins / App Editors can manage columns in the Table view only on Open boards.
Groups in Table view allow you to divide and organize tasks within your project for better workflow management and clarity. They help you segment work by team, priority, phase, or category, making large projects easier to navigate and manage.
By default, a new Table view applies the None grouping option. This means all tasks appear in a single list until you create your first group.
Add a new group
Groups allow you to organize tasks within a board by categories, sprints, or workflow stages.
Steps to add a new group:
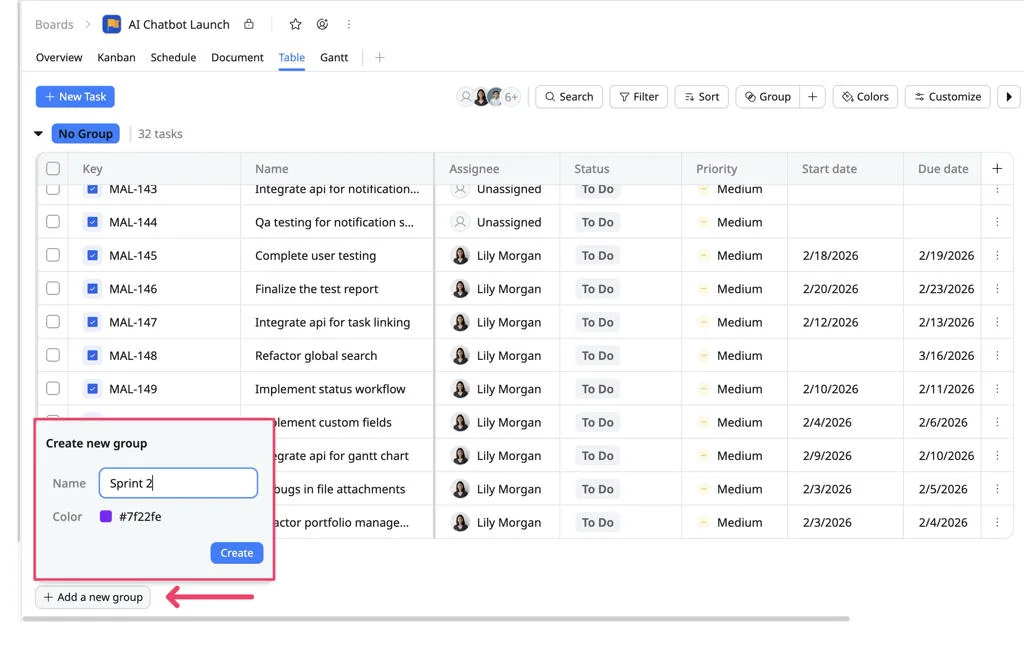
- Click + Add a new group at the bottom of the Table view.
- Enter a descriptive name for the group (e.g.,
Sprint 1,Frontend,Backlog). - Choose a color to visually distinguish the group.
- Click Create to add the group to your board.
Move tasks between groups
You can move tasks to different groups in Table view using either of the following methods:
Option 1: Drag & drop
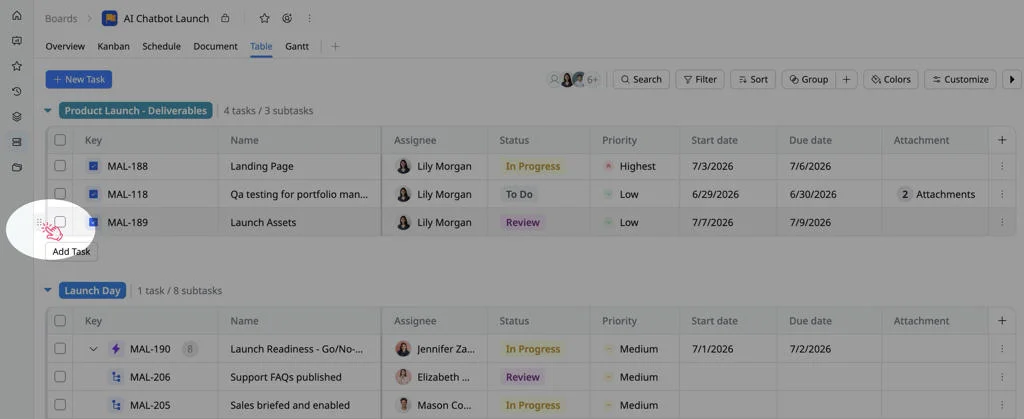
- Hover over the task row to find the drag handle icon (⁞⁞).
- Click and hold the icon, then drag the row to your target group.
- Release the mouse button to drop the task into its new group.
Option 2: Use the Task Details Panel
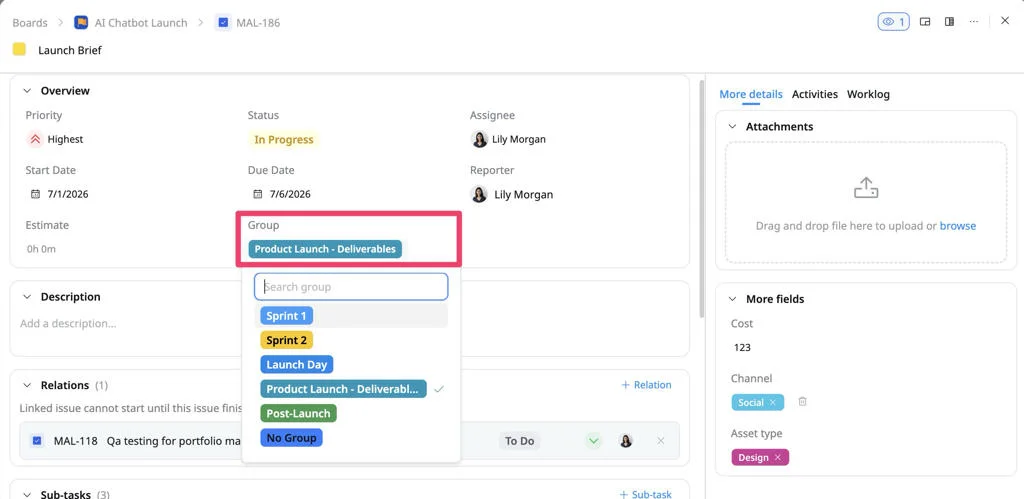
- Click on the task to open the Task Details panel.
- Find the Group field in the Overview section.
- Click the drop-down and select the new group for the task.
Collapse and expand a group
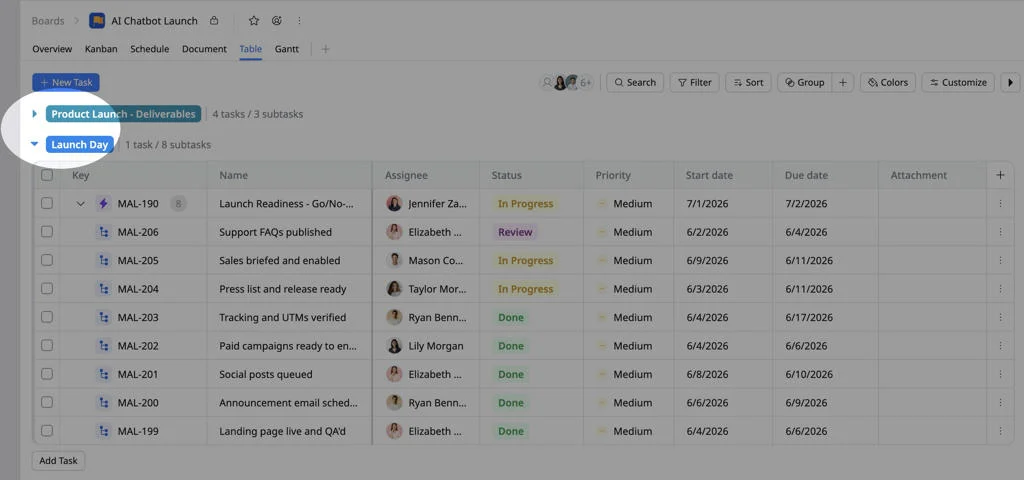
Groups in Table view can be expanded or collapsed to simplify your workspace and focus on relevant tasks.
- Locate the group header in your Table view.
- Click the arrow icon next to the group name.
- Expanded (▶): Tasks within the group are visible.
- Collapsed (▼): Tasks within the group are hidden.
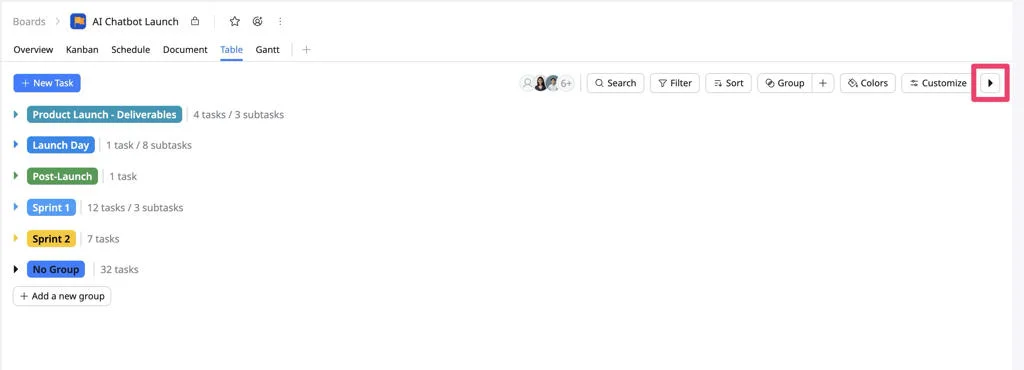
You can quickly collapse or expand all groups at once by clicking the arrow icon in the top-right corner of the toolbar.
Edit a group
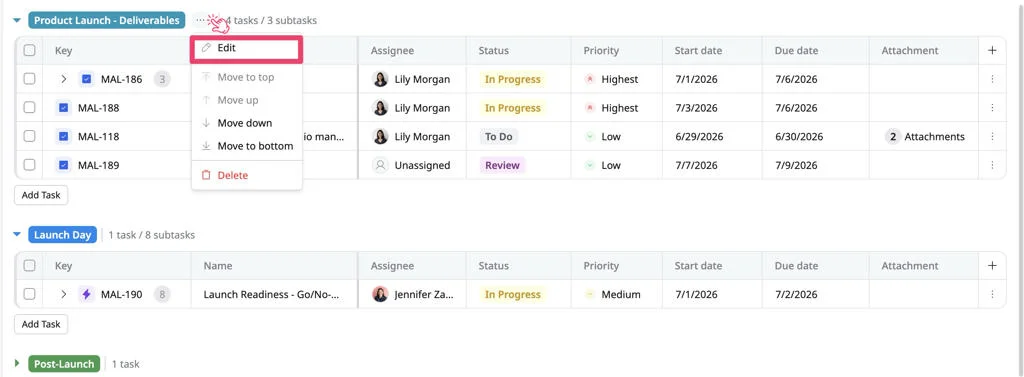
To edit a group:
- Hover over the group header text.
- Click the three dots (…) icon on the far right of the header line.
- Select the Edit option from the dropdown menu.
- Change the group name and/or color as needed.
Delete a group
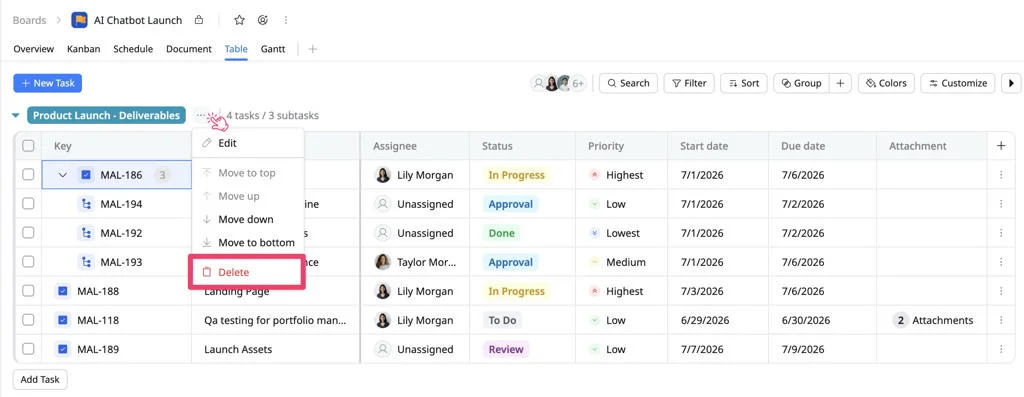
To remove a group from your board:
- Hover over the group header text.
- Click the three dots (…) icon on the far right of the header line.
- Select the Delete option from the dropdown menu.
- A confirmation pop-up will appear. Choose how you want to handle the tasks inside the group:
- Move tasks – Select another group to move tasks into.
- Delete all tasks – Permanently delete all tasks in this group.
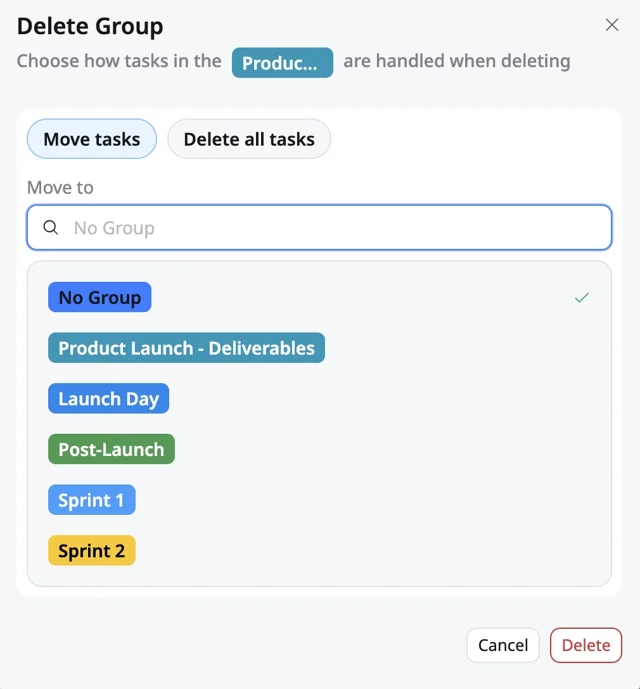
- Click Delete in the modal to confirm and remove the group.
Reorder a Group
To change the position of a group within your board:
- Hover over the group header text.
- Click the three dots (…) icon on the far right of the header line.
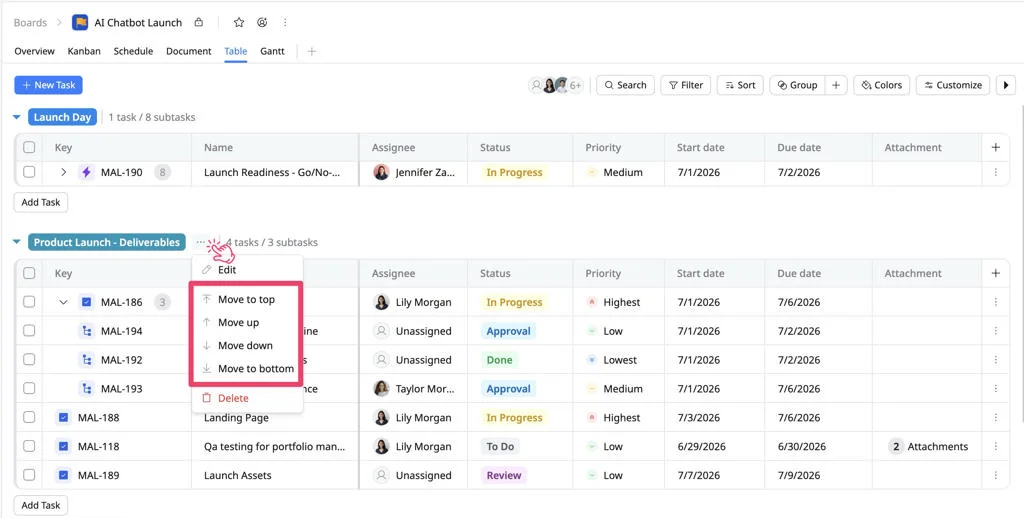
- Choose one of the following move options:
- Move to top – Move the group to the top of the list.
- Move up – Shift the group up one position.
- Move down – Shift the group down one position.
- Move to bottom – Move the group to the bottom of the list.