Roles & Permissions
Site permissions allow you to control what users can see and do within your site by assigning roles with the appropriate level of access and permissions.
Site permissions in TaskFord allow you to control exactly what users can see and do within your site. By assigning roles, you ensure that each team member has the appropriate level of access based on their responsibilities. Here’s a detailed breakdown of how to manage roles and permissions at the site level.
Access the Roles & Permissions tab
To access Roles & Permissions settings:
- Navigate to the Site settings page.
- Select the Permissions & Roles tab under the Administration section from the left-hand menu.

From here, you can assign roles and manage permissions for your site, determining what actions each role can perform across the entire site.
Role types
There are two primary role types available at the site level:
1. Default roles
Default roles come with predefined permissions that cannot be modified. These roles follow a hierarchy, where higher-level roles inherit permissions from lower-level ones.
- Admin: Full access to manage the site content, settings, and member roles.
- Editor: Can create, update, and manage site content (including boards, tasks, and portfolios).
- Viewer: Can only view content across the site, with no editing permissions.
2. Custom roles
Custom roles allow you to create tailored roles that match specific team functions or responsibilities. You can define exactly what actions each custom role is allowed to perform across the site.
Each custom role’s capabilities are determined by the role-based permission matrix, which shows the available actions for that role.
👉 Refer to the role-based permission matrix to see a full breakdown of permissions for each role.
Manage custom roles
Create a custom role
- Under the Custom roles section, click the + New Role button.

- In the Create roles dialog:
- Enter a role name
- Add a description to explain the purpose of the role, such as what actions the user is allowed to take.
- Use the checkboxes in the Permissions section to select the specific access rights. Tip: Use the search bar to find specific permissions quickly

- Click Create to finalize the new role.
👉 The new role will appear in the list and can be assigned to members. You can then assign this role to site members and adjust the permissions of this role just as you would for any other permissions.
Update permissions for a custom role
You can update a custom role at any time to control what users assigned to that role can access and manage within your site.
How to update permissions
- In the Permissions & Roles page, select a custom role from the left-hand panel.
- In the right-hand panel, review the available permission categories and actions.
- Check a box to grant permission, or uncheck it to remove permission. Tip: Use the search bar to find specific permissions quickly.

👉 Changes are applied to all users currently assigned to that role.
Default roles use fixed permissions, so only custom roles can be fully adjusted.
Edit a custom role
You can update a custom role’s name or description at any time without changing its existing permissions.
How to edit a custom role
- In the Permissions & Roles page, select a custom role from the left-hand panel.
- Click Edit in the right corner.
- In the Update role dialog:
- Update the role name
- Update the description
- Click Save to apply your changes.

Editing a role’s name or description does not change its permissions. To update access rights, you must modify the permissions separately.
Delete a custom role
Delete a custom role when it is no longer needed or has been replaced by another role.
How to delete a custom role
- In the Permissions & Roles page, select a custom role from the left-hand panel.
- Click Delete in the right corner.
- In the confirmation dialog: Select another role to reassign users who are currently using this role
- Click Delete to confirm.

This role will be permanently deleted. You must reassign affected users before the role can be deleted.
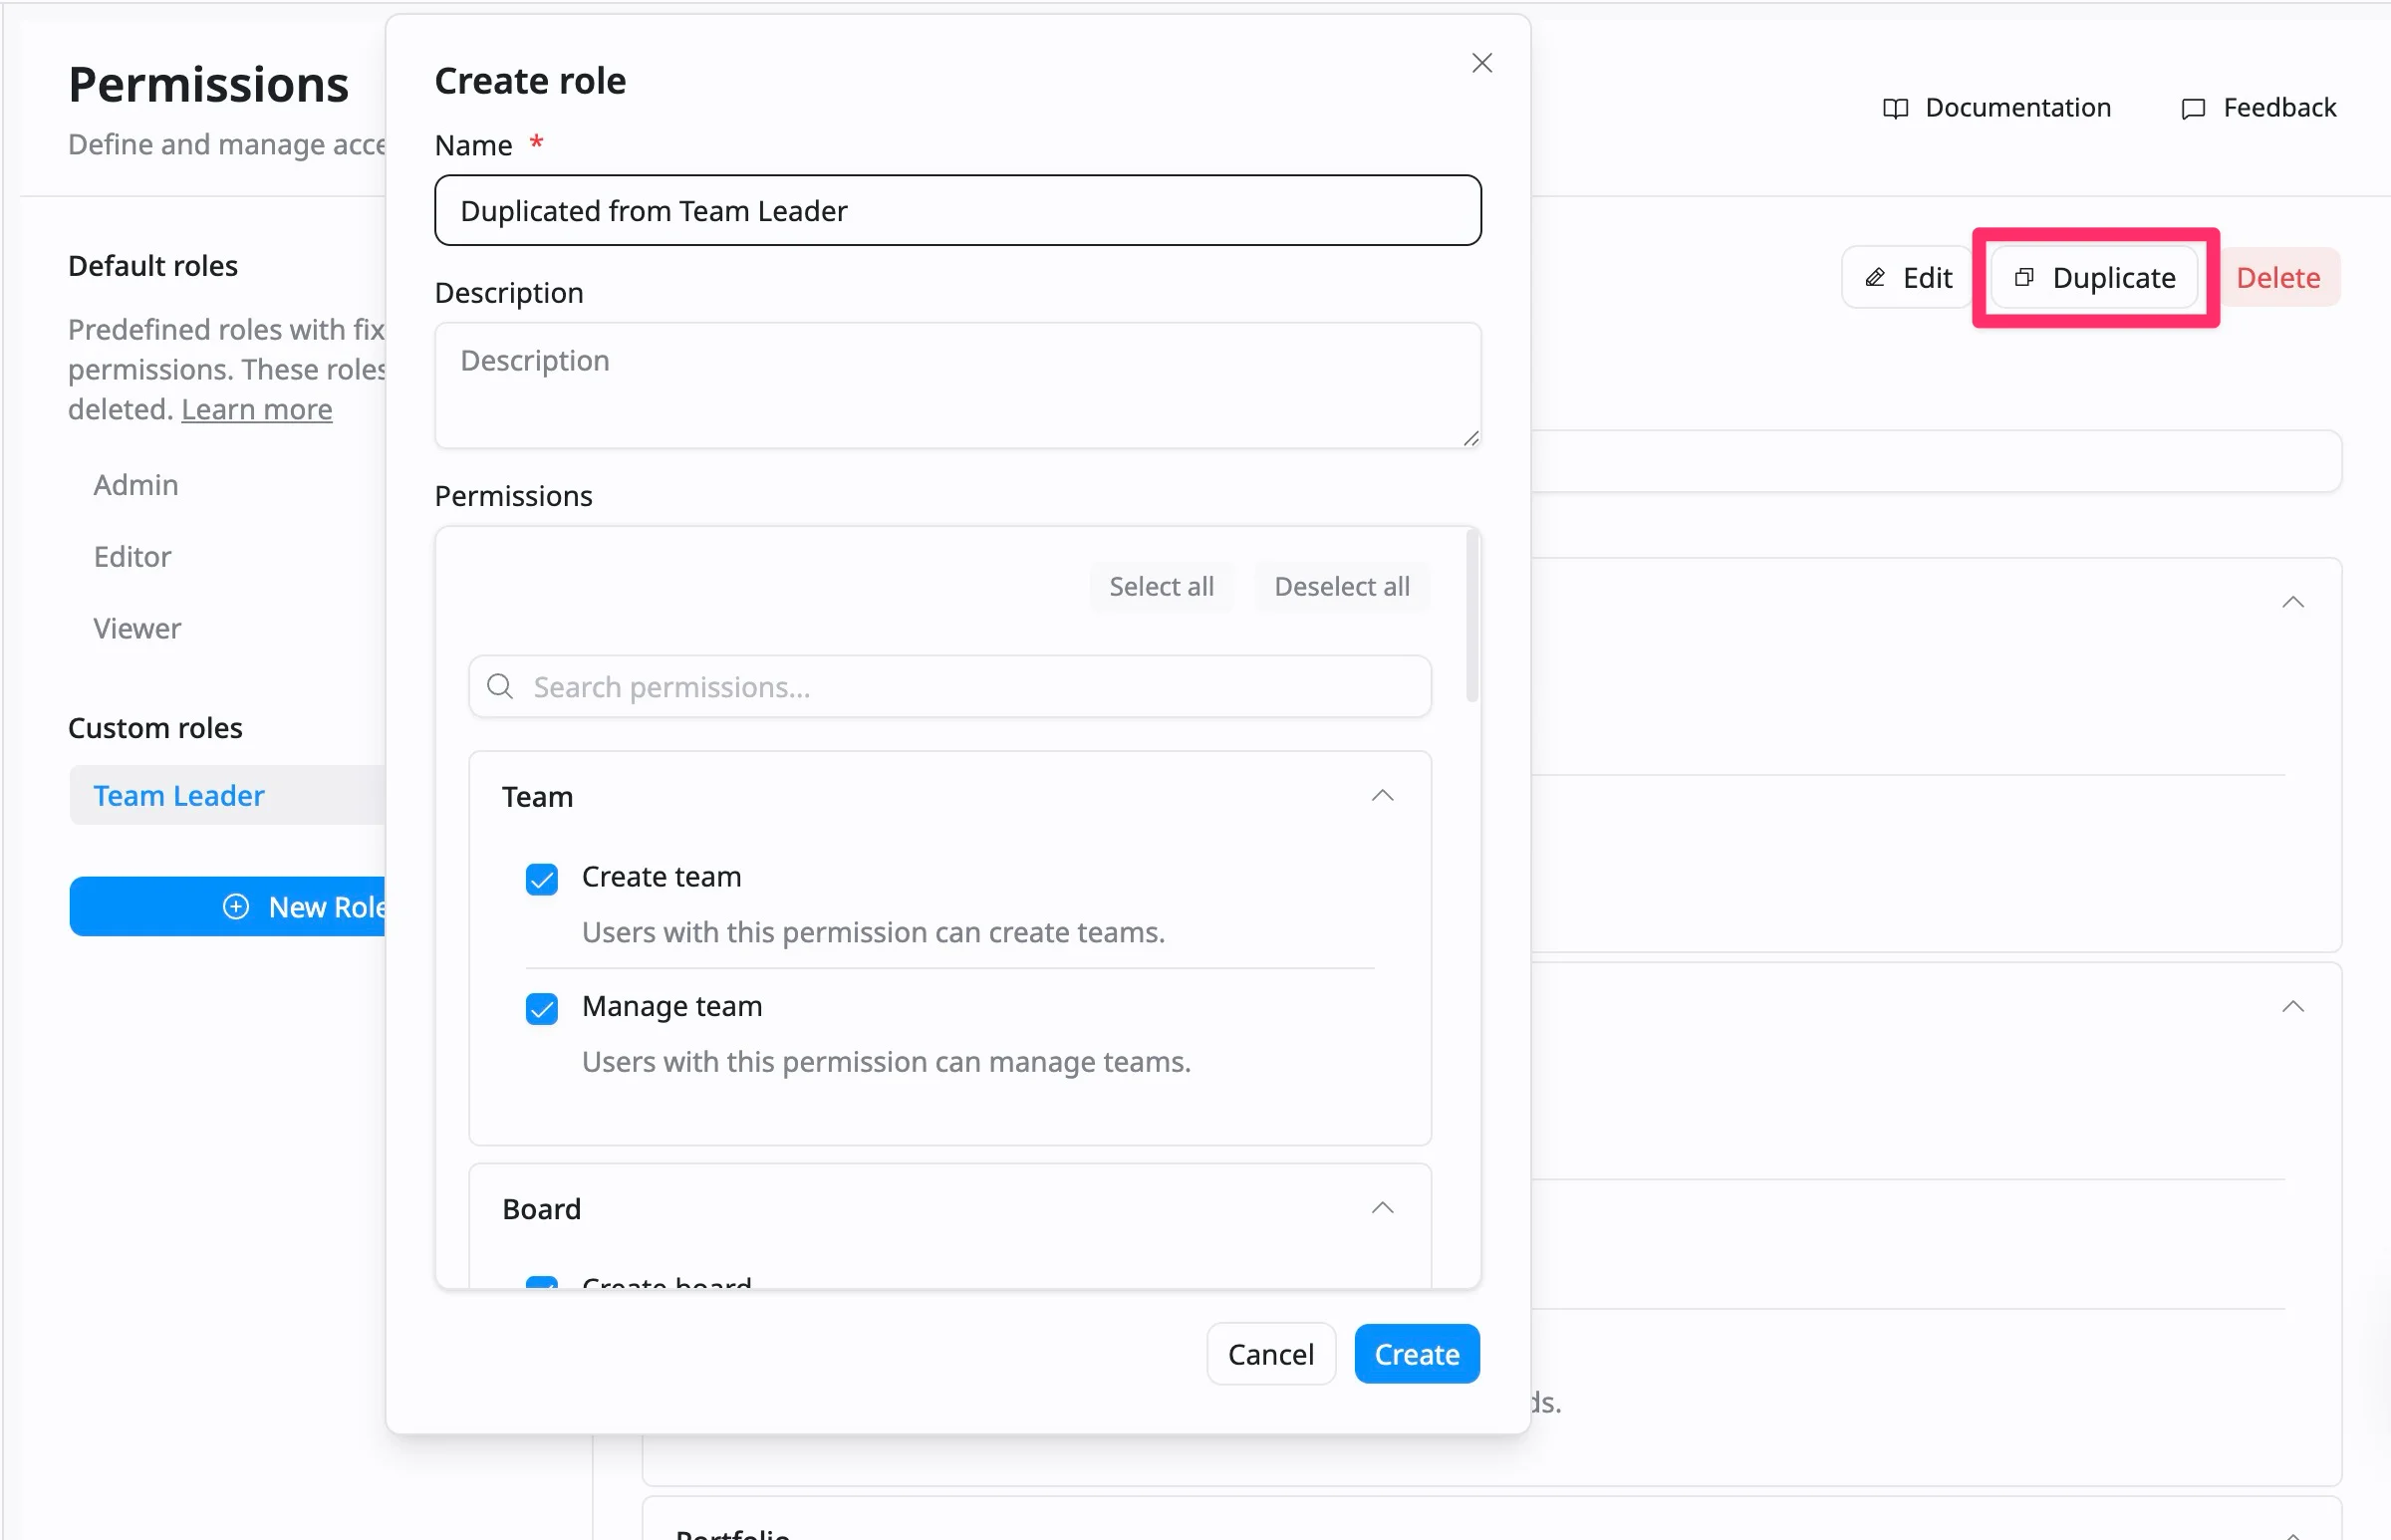
Duplicate a role
You can quickly create a new role by duplicating an existing one. This is useful when setting up roles with similar permissions, allowing you to save time instead of creating a role from scratch.
How to duplicate a role
- In the Permissions & Roles page, select the default or custom role you want to duplicate.
- Click Duplicate in the top-right corner.
- In the dialog window, enter a name for the new role.
- Review and adjust the copied permissions as needed.
- Click Create to finish.
After creating a role, you can assign it to members from the User management